Step by step
Hand-auger well drilling
Simón and the family choose the site together, then the family does the drilling with his guidance.
Choosing a site and drilling: illustrated steps 1–8.
Step 1
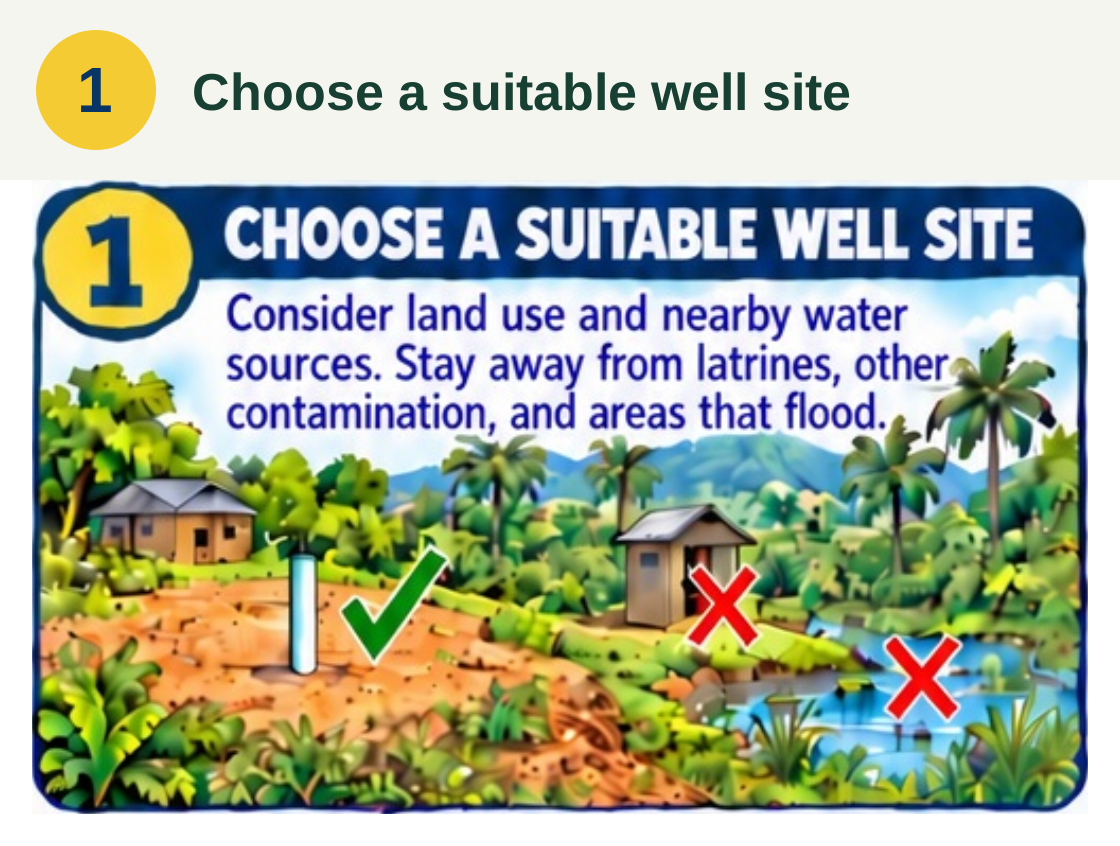
Choose a suitable well site
Simón works with community and family members to choose a well site. They consider how the surrounding land is used, where water remains during the dry season, and how far the site is from latrines and other sources of contamination. High ground away from flooding and runoff helps protect the well. Stable ground and space to work also matter when the team begins turning and lifting the auger.
Work with Simón to choose a suitable well site. Consider how the surrounding land is used, where water is found throughout the year, and the distance from latrines and other sources of contamination. Avoid places that flood or collect runoff. Check that the ground is stable and leave room for the team to turn and lift the auger.
Step 2
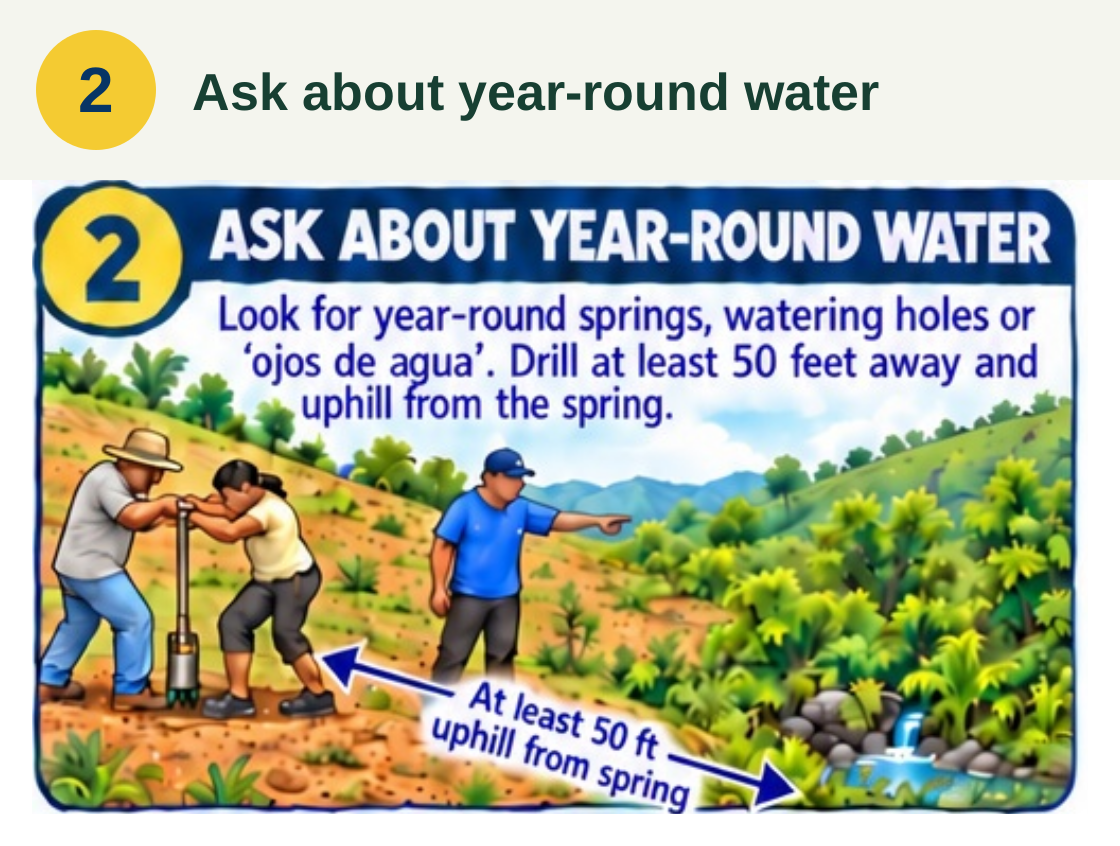
Ask about year-round water
Nearby families help Simón learn where water remains throughout the year. Their knowledge of springs, watering holes, and ojos de agua gives him a starting point for choosing a location. The well is placed at least 50 feet away and uphill from a natural spring, with attention to latrines, runoff, and the ground around it.
Ask nearby families where water remains through the dry season. Look for year-round springs, watering holes, or ojos de agua. Drill at least 50 feet away and uphill from a natural spring. Check the final location with an experienced driller, accounting for latrines, runoff, and ground conditions.
Step 3
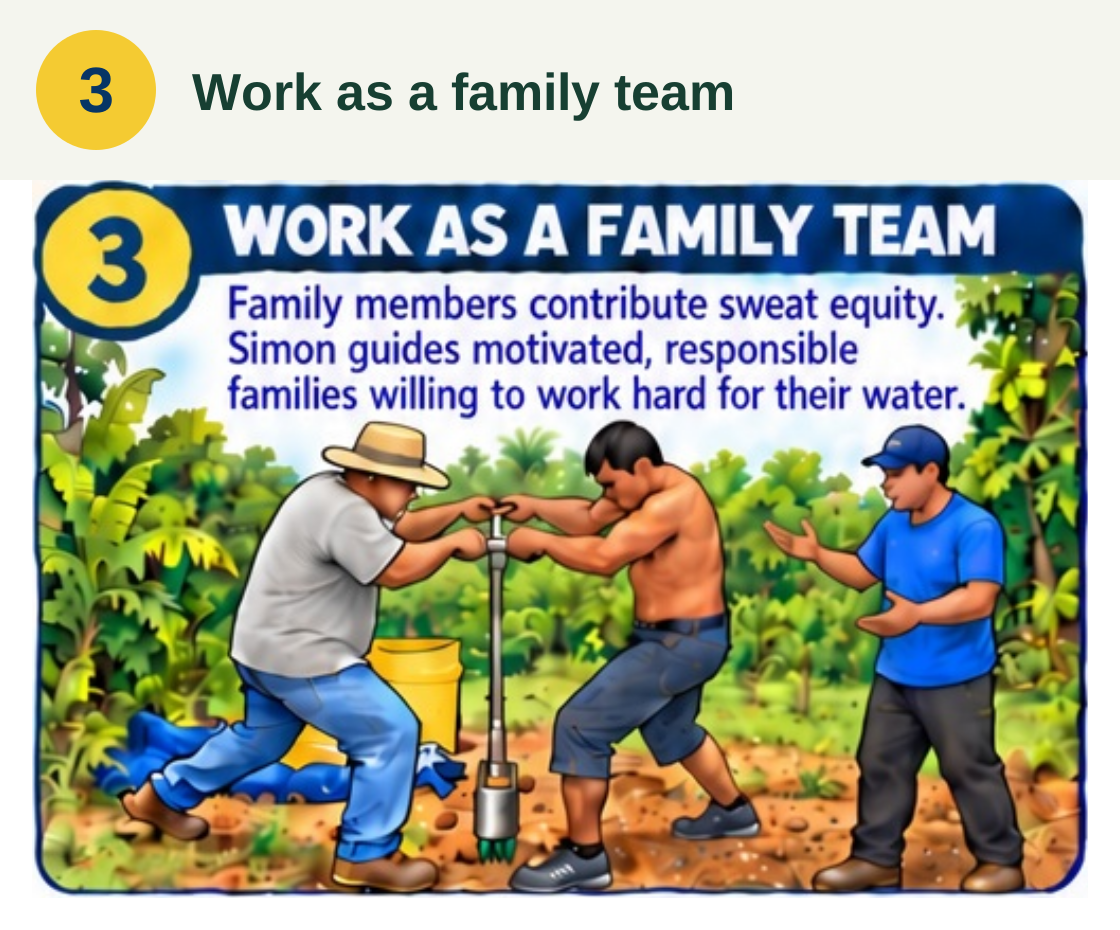
Work as a family team
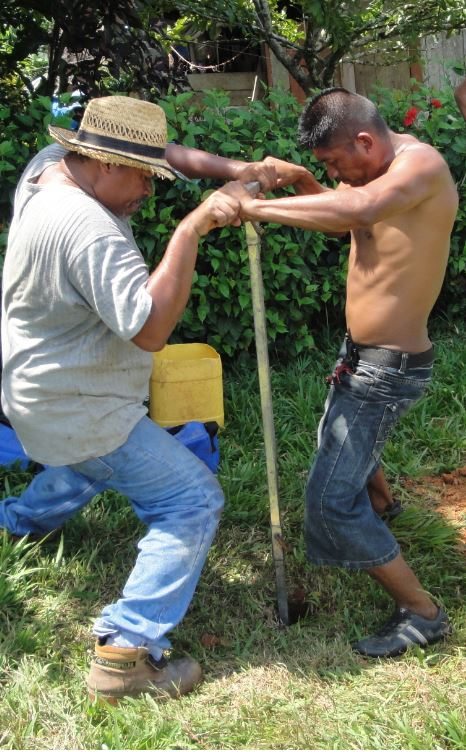
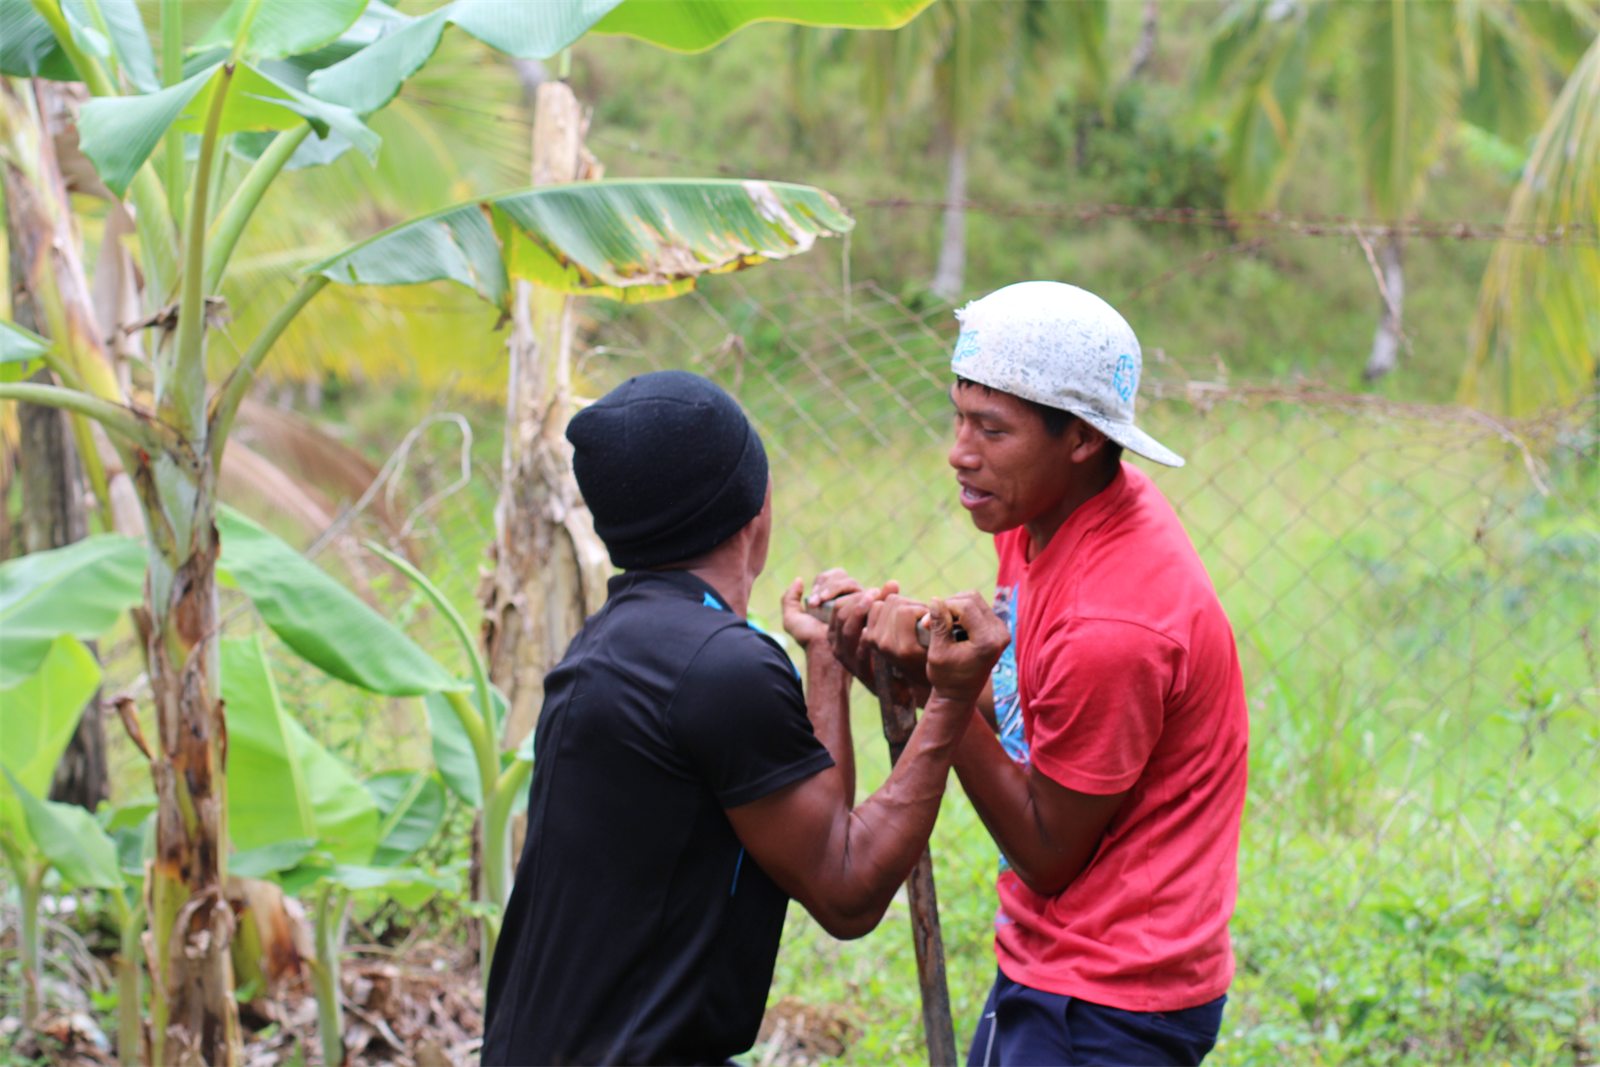
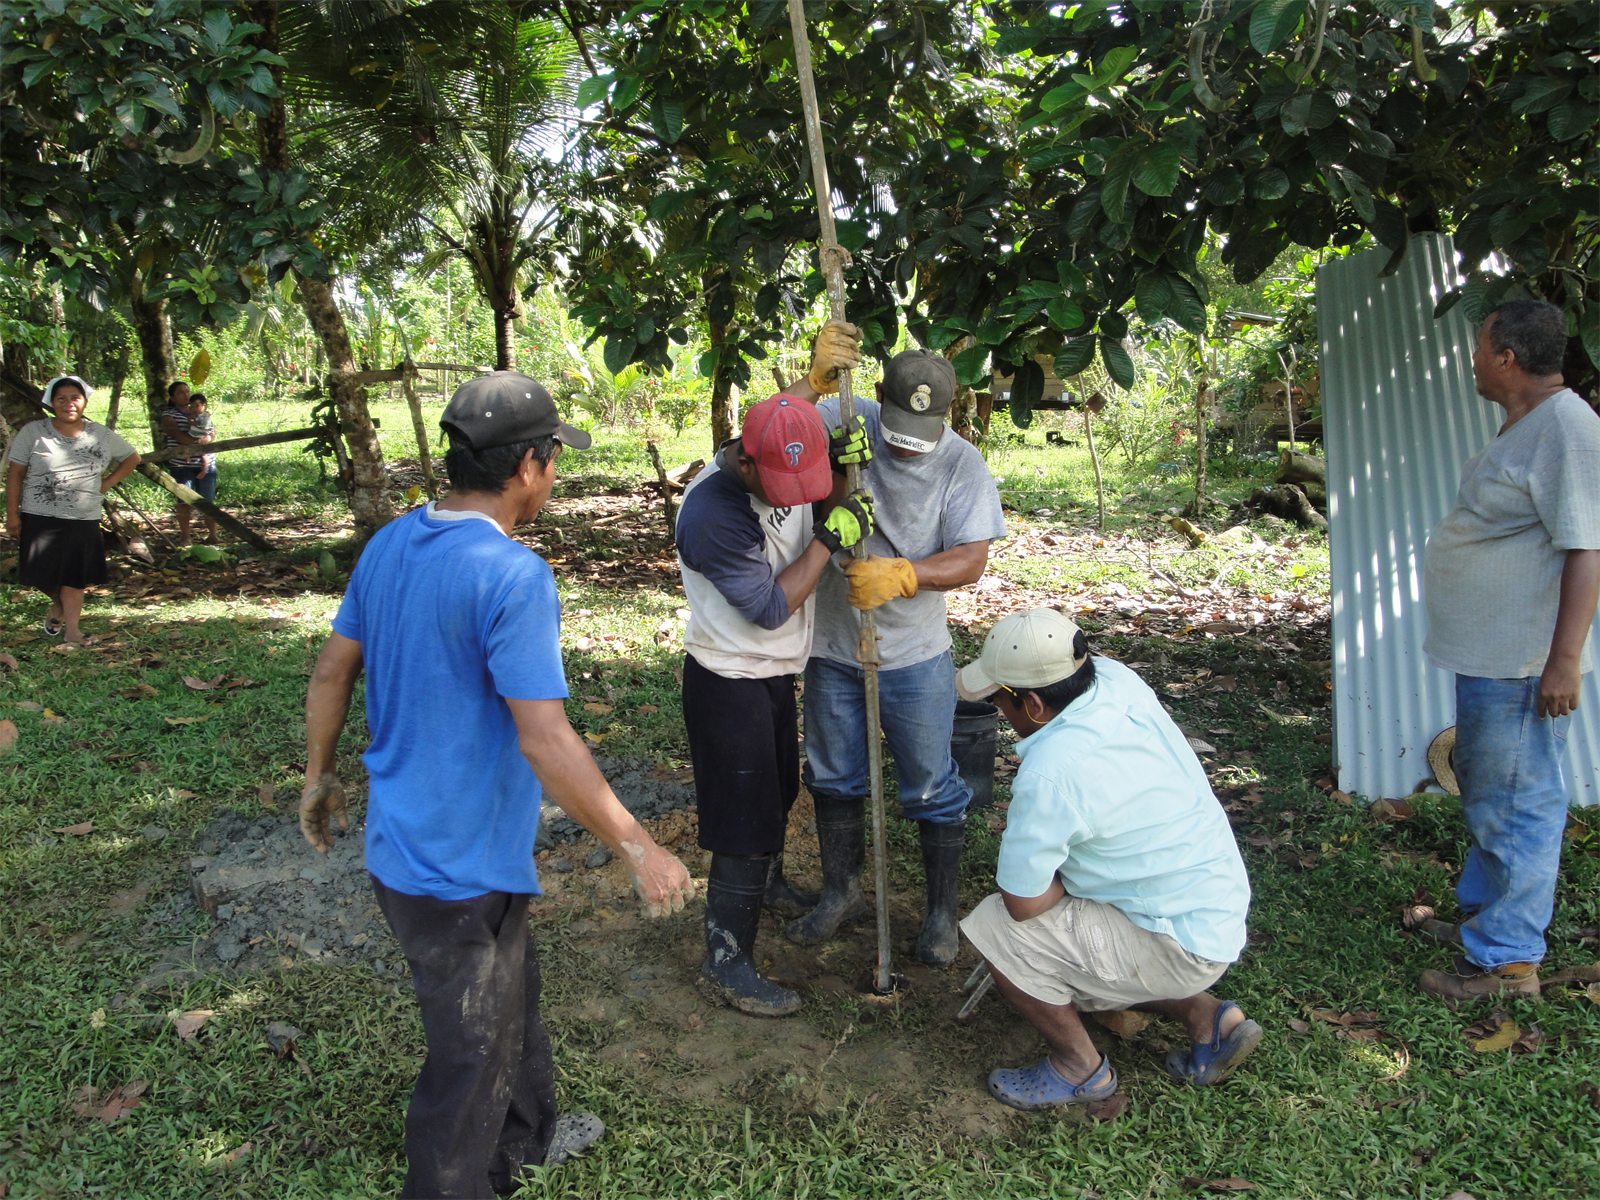
Two or three strong adults take turns working together to turn and lift the auger. Simón teaches the method and works alongside motivated, responsible families. Their effort—their sweat equity—is central to the partnership. As they build the well, they also learn the skills they will need to care for it.
Work with two strong adults who can turn and lift together. Family members contribute sweat equity and learn the skills they will need to maintain the well. Simón trains and guides motivated, responsible families willing to work hard for their water.
Step 4
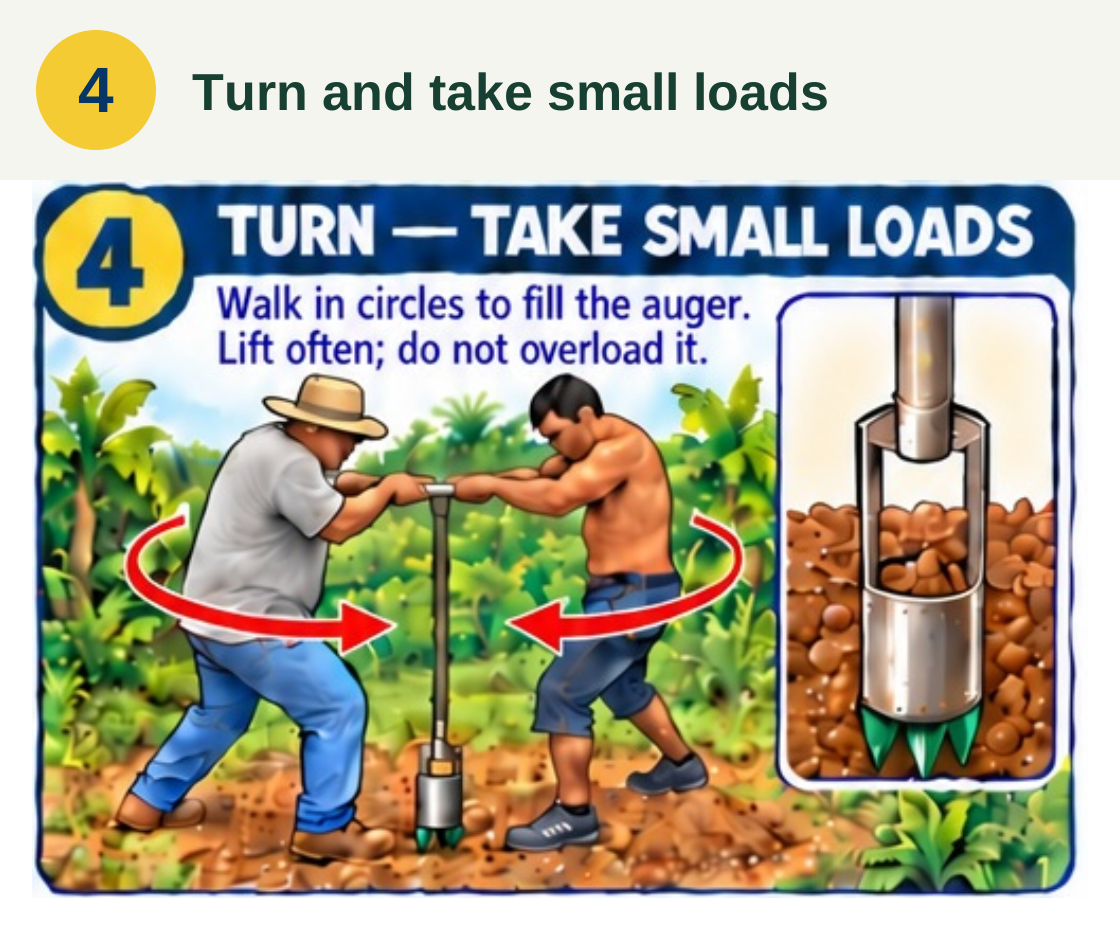
Turn and take small loads
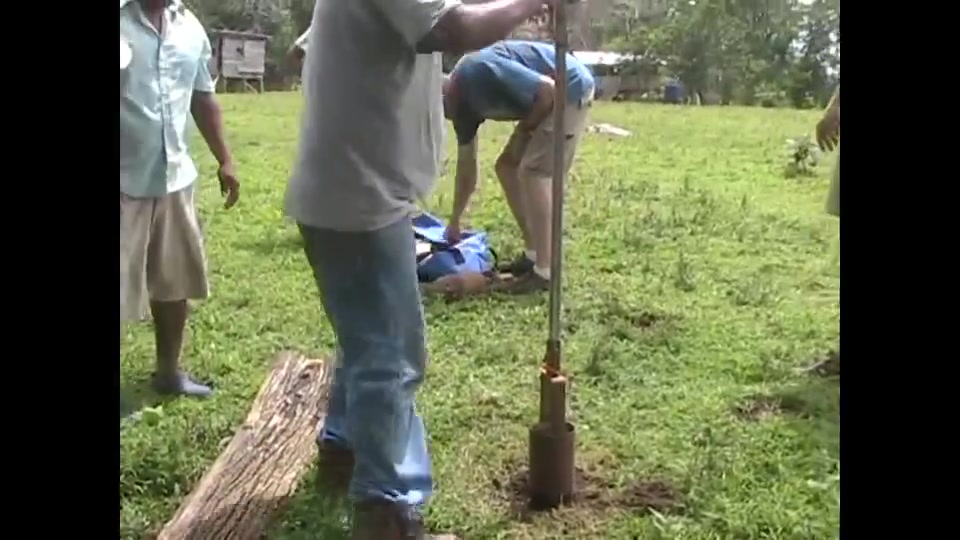
The operators walk in circles around the handle, turning the auger as it fills with soil. They take small loads and lift it often, before it becomes too heavy to pull out. Working at the same pace helps them feel changes in resistance and notice when the auger catches on something below.
Walk in circles around the normal handle to turn the auger. Take small loads and lift often, before the chamber becomes too heavy to pull out. Keep both operators moving together and pay attention to changes in resistance.
Step 5
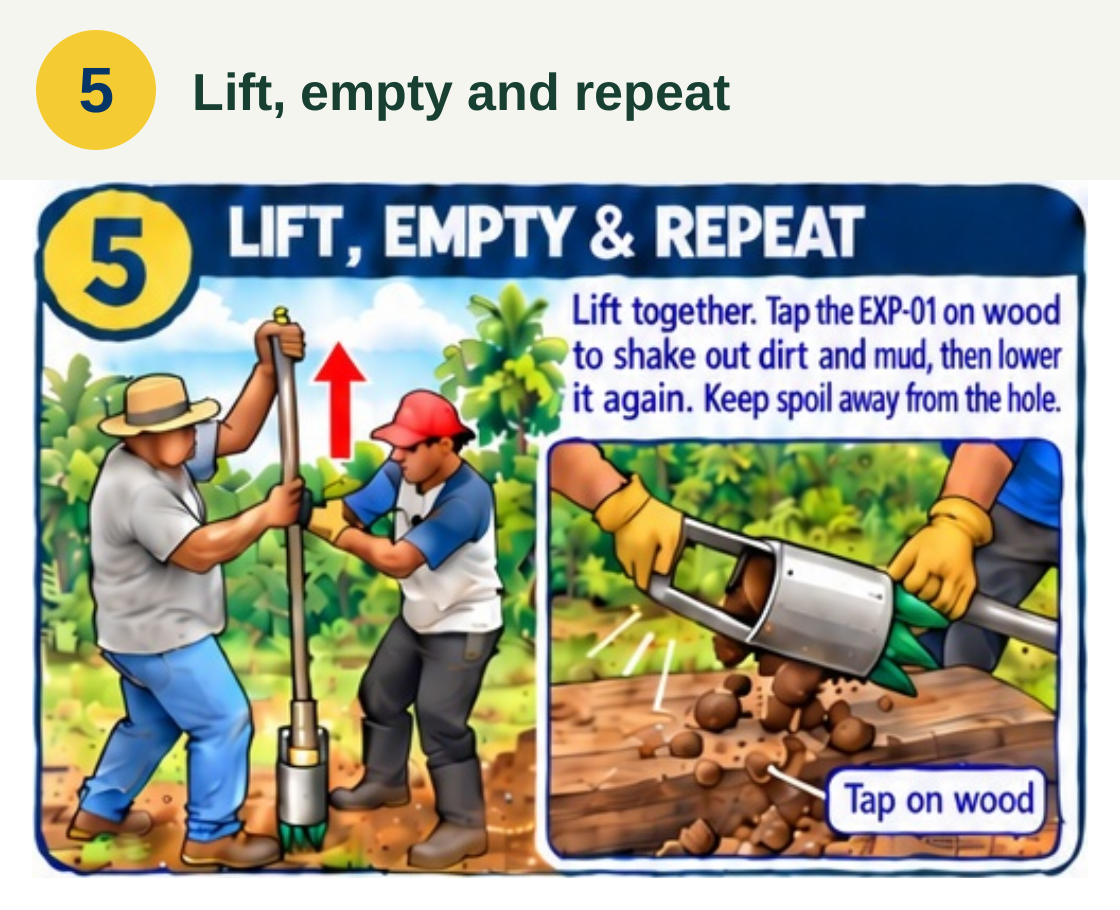
Lift, empty and repeat
Once a load is ready, the team lifts the auger out together. Tapping the EXP-01 against a wooden log shakes the dirt and mud out of its chamber. The soil is emptied away from the opening so it cannot fall back in. Then the auger goes down for another pass.
Lift the auger together. Tap the EXP-01 against a wooden log or another wood surface to shake dirt and mud out of the chamber. Empty the load away from the hole so the soil cannot fall back in. Lower the auger and repeat.
Step 6
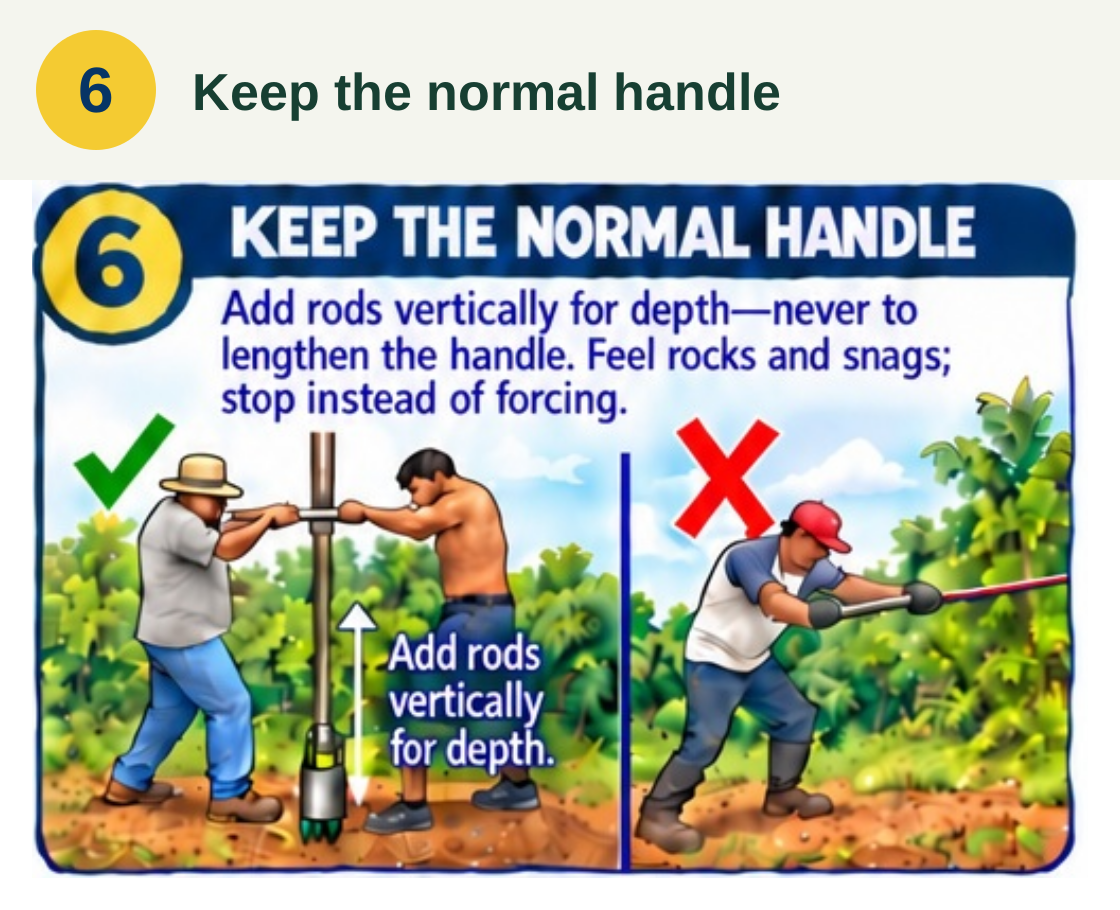
Keep the normal handle
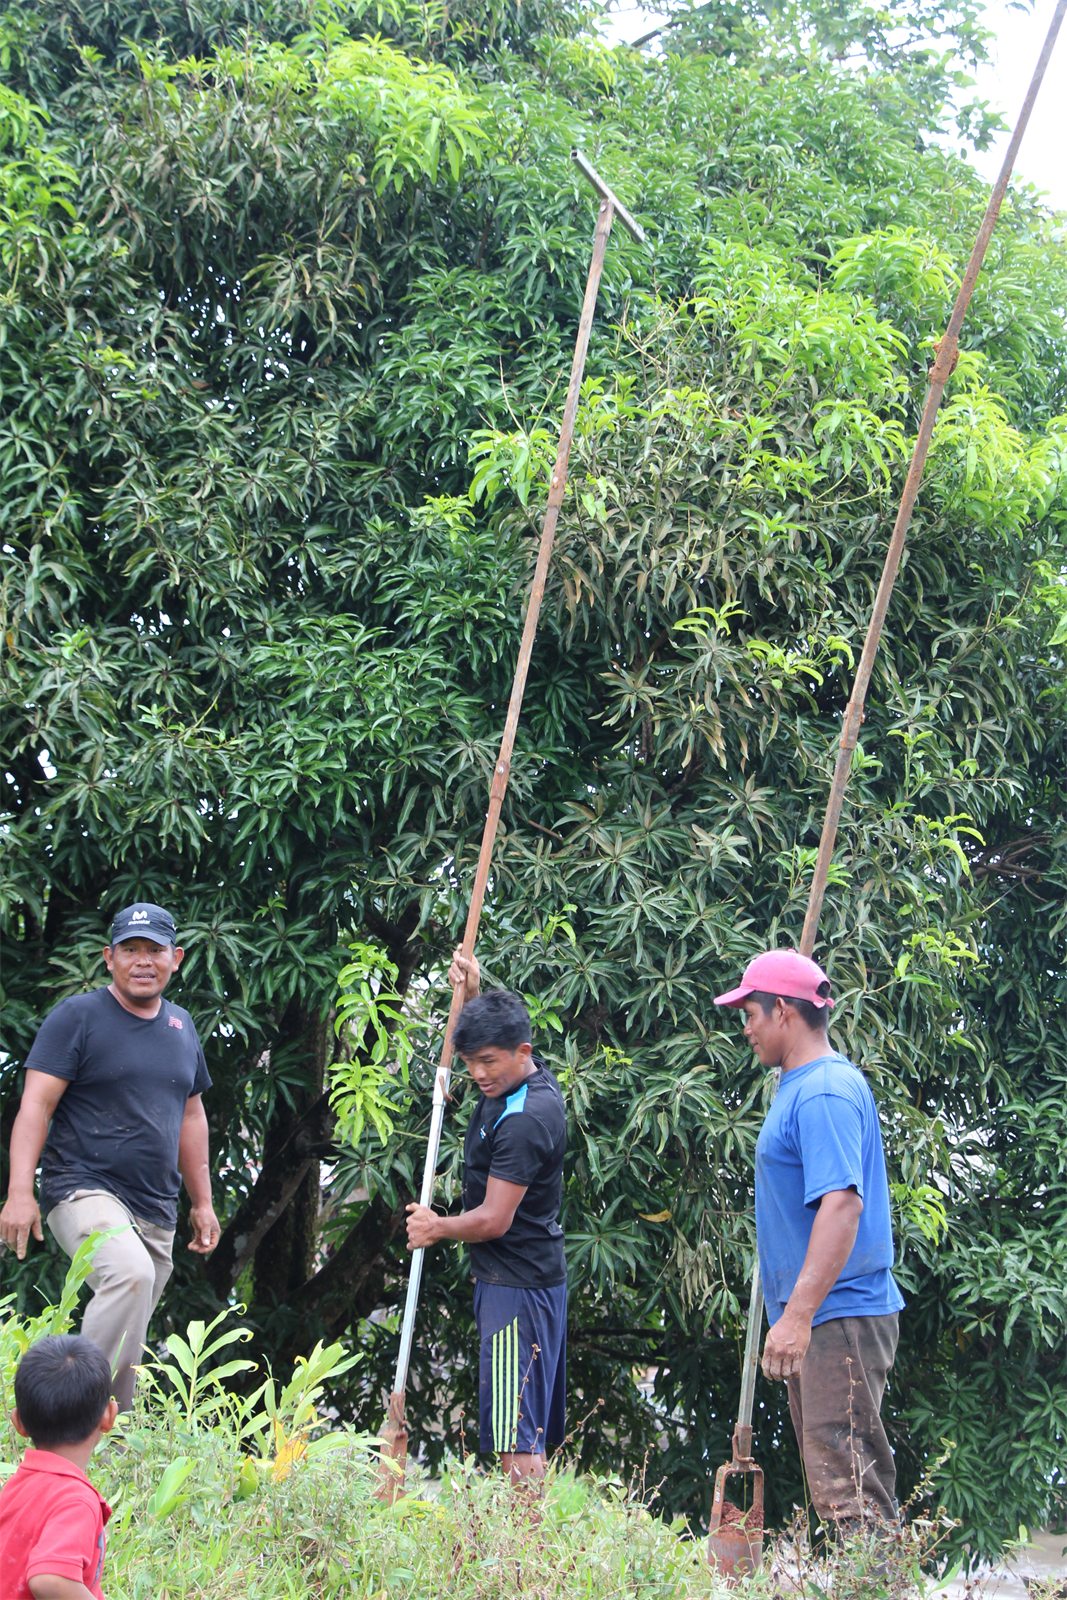
As the hole gets deeper, the team adds extension rods vertically. The handle stays at its normal length so the operators can still feel rocks and snags through the tool. Extra leverage could break the auger or rods, so they stop and investigate when it catches rather than forcing it.
Add extension rods vertically as the hole gets deeper. Keep the normal handle length; do not attach rods to the handle for extra leverage. You need to feel rocks and snags through the tool. Stop when the auger catches instead of forcing or twisting the rig.
Step 7
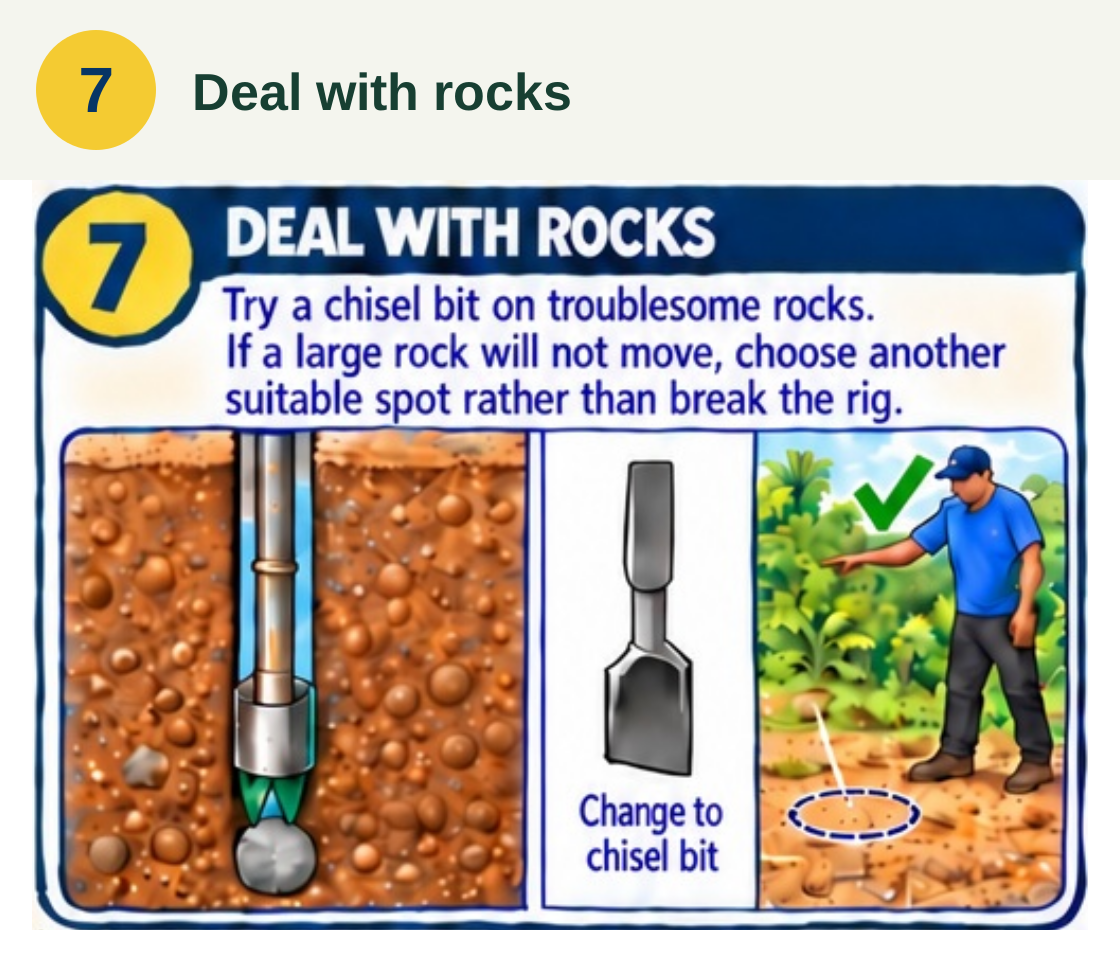
Deal with rocks
A troublesome rock sometimes calls for a change of tools. The team replaces the auger with a chisel bit to try to loosen the obstruction, then returns to drilling if it comes free. When a large rock will not move, Simón helps the family choose another nearby location rather than risk breaking the equipment.
When a rock stops the auger, change to a chisel bit and try to loosen it. Return to the auger once the obstruction is free. If a large rock will not move, choose another suitable nearby location instead of breaking the auger or extension rods.
Step 8
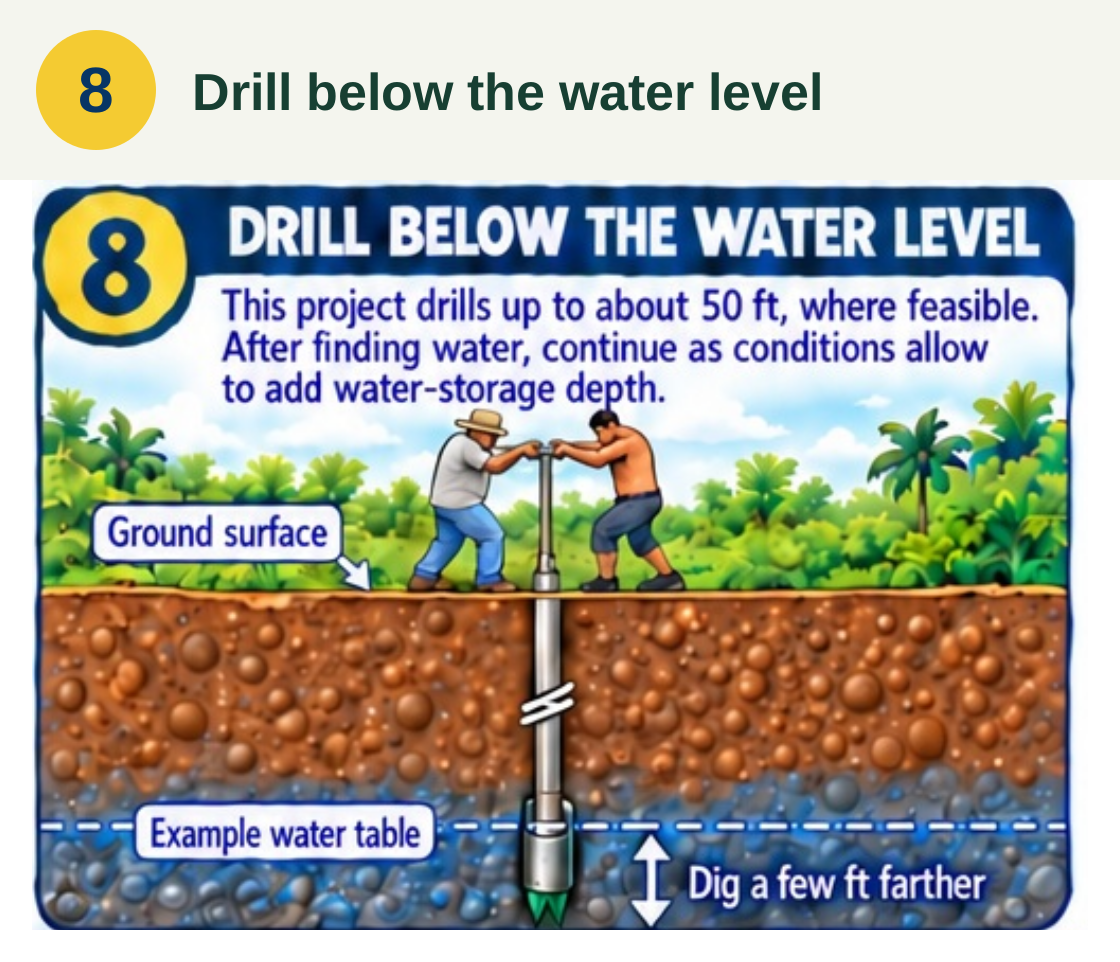
Drill below the water level
Finding water is an important moment, but it is not always the end of drilling. Where the ground allows it, the team continues a few feet below the water table to give the well more water-storage depth. This equipment can reach about 50 feet in suitable conditions. The operators stay at the surface, and the finished depth determines the lengths of casing and pump pipe needed.
Continue below the water table as far as conditions reasonably allow to add water-storage depth. Wells can reach about 50 feet with this equipment where feasible. Keep the drillers at the surface and measure the finished depth before preparing the casing.
Preview the complete print sheet
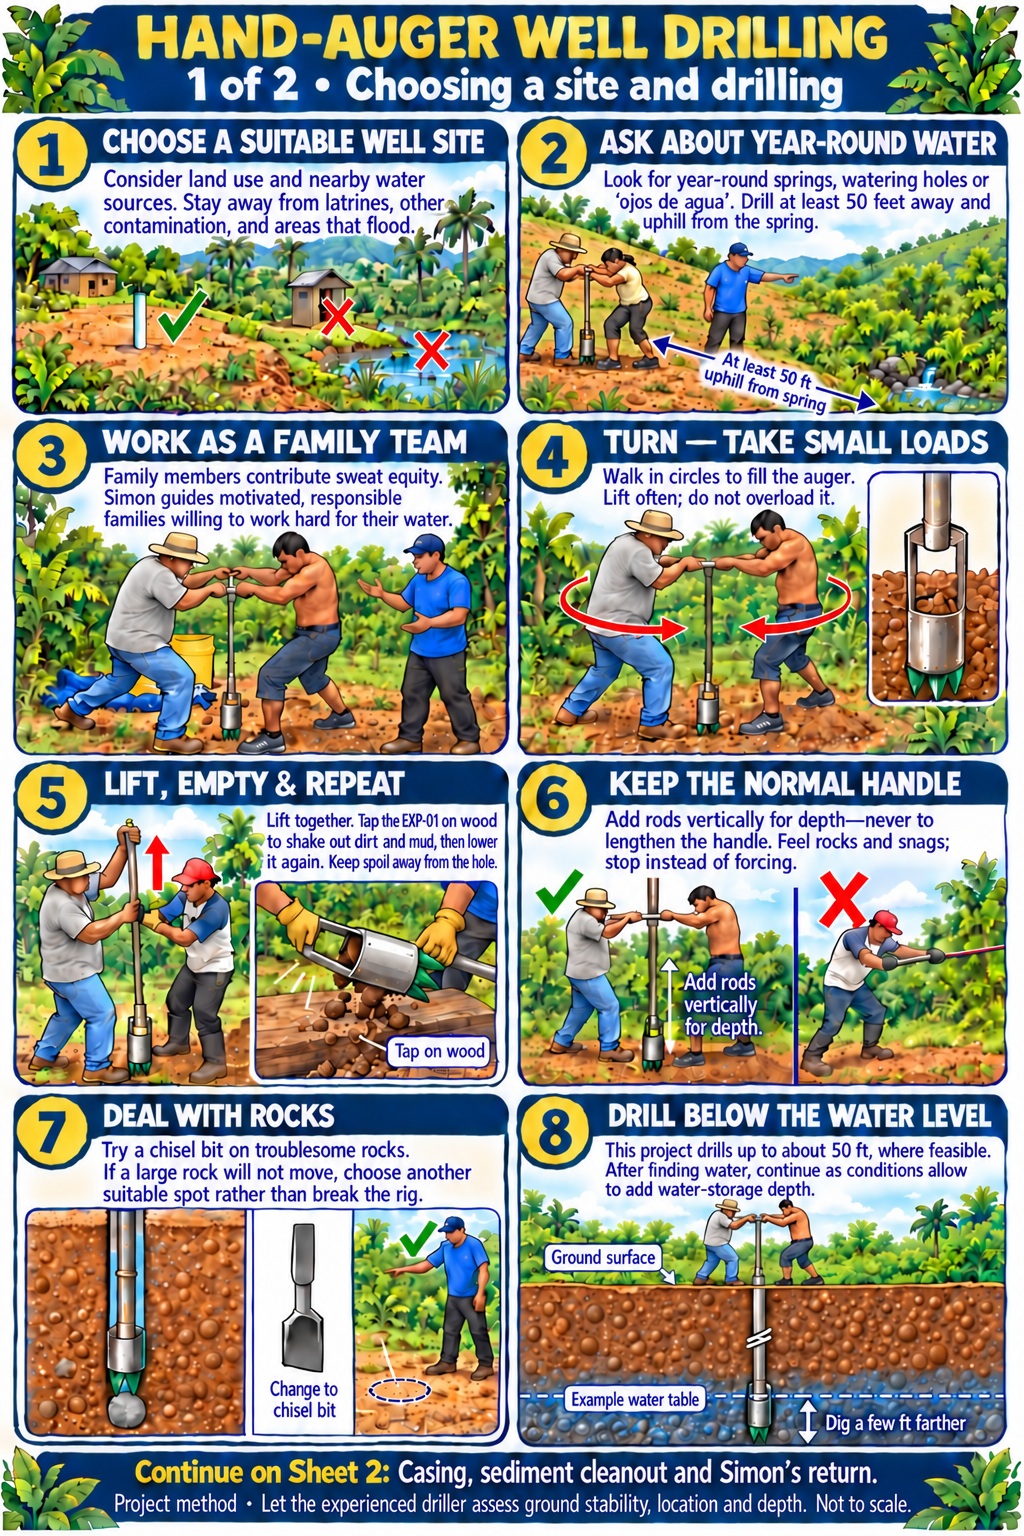 See the illustrated steps
Construction details
Choose a suitable well site
Choosing the location begins with a conversation and a walk around the area. Simón and the family look at how the land is used, nearby springs and watering holes, and the distance from latrines and other sources of contamination. They look for stable, high ground away from flooding and runoff. A well near a natural spring is placed at least 50 feet away and uphill from it.
Turn the auger as a family team
Two or three strong adults share the work, taking turns around the auger’s normal handle. They walk in circles to turn it, lifting out small loads before the tool becomes too heavy. Simón teaches and guides; the family contributes the labor and learns skills that will help them care for the well afterward.
Lift, empty, and repeat
Each pass brings another load of soil to the surface. The team lifts the EXP-01 auger together and taps it against a wooden log to shake dirt and mud out of the chamber. The soil is emptied away from the well opening, and the tool goes back down for the next load.
Add rods vertically for depth
Extension rods take the auger deeper while the handle stays at its normal length. This lets the operators feel rocks and snags without adding enough leverage to damage the equipment. A chisel bit can help loosen a troublesome rock. If an obstruction will not move, the team chooses another suitable site rather than force the rig.
Let conditions guide the final depth
The soil and water conditions determine how deep the team can go. This equipment can reach about 50 feet where feasible. After finding water, the team continues a few feet farther when conditions allow, adding storage below the water table. The finished depth determines how much casing and pump pipe the well needs.