Step by step
Casing and cleaning the well
The prepared kit becomes a well lining, a filter, and a way for the family to clear out sediment before the pump is installed.
Prepare the well for the pump: illustrated steps 9–17.
Step 9
Identify the kit
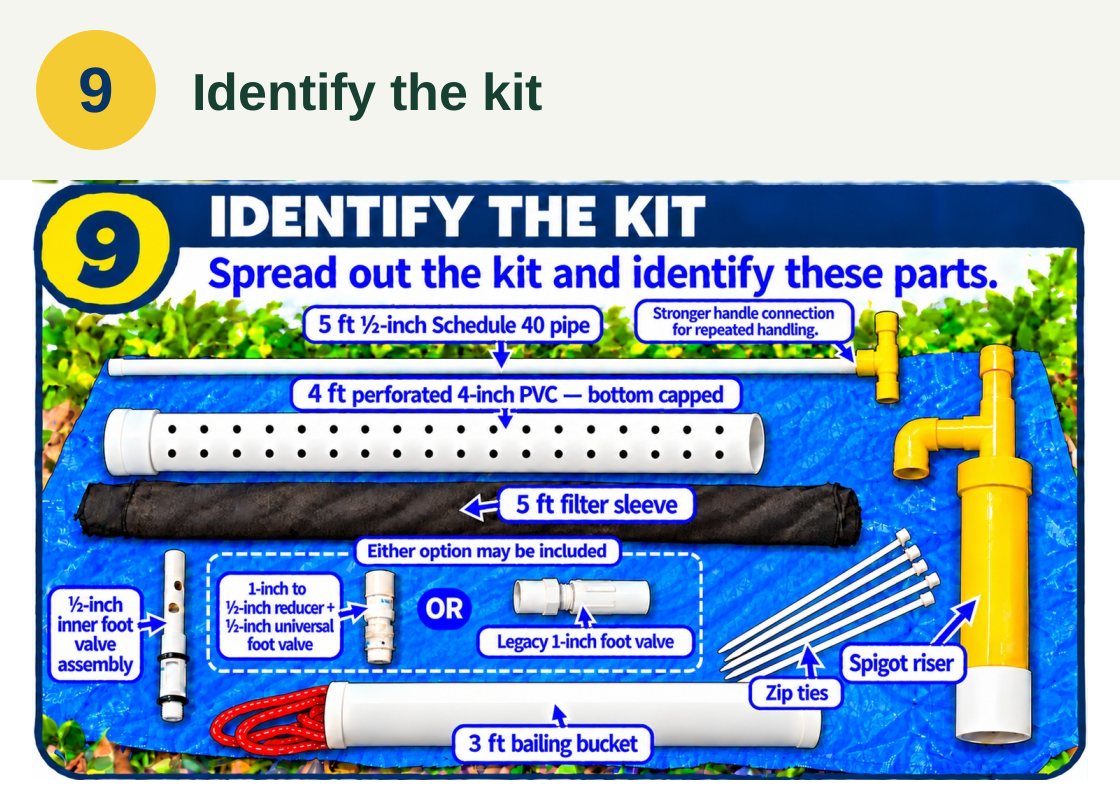
The kit brings together the large casing parts, filter sleeve, and bailing bucket, along with the smaller pump components. For the outer pipe, a kit may include either the legacy 1-inch foot valve or our universal ½-inch valve with a 1-inch-to-½-inch reducer. The long casing and pump pipes are extended at the well site to suit its depth.
Lay out the kit before starting. Check the large casing parts, the filter sleeve, and the bailing bucket separately from the smaller pump valves. The outer foot valve may be either the legacy 1-inch valve or the universal ½-inch valve attached to a 1-inch-to-½-inch reducer. Extend the long pipes at the well site.
- 4-foot perforated 4-inch PVC section, bottom capped
- 5-foot filter sleeve and long zip ties
- 3-foot white bailing bucket and rope
- Spigot and fixed 4-inch riser
- ½-inch inner foot-valve assembly
- Either outer foot-valve option
- 5-foot ½-inch Schedule 40 pipe with handle attached
Step 10
Join the casing
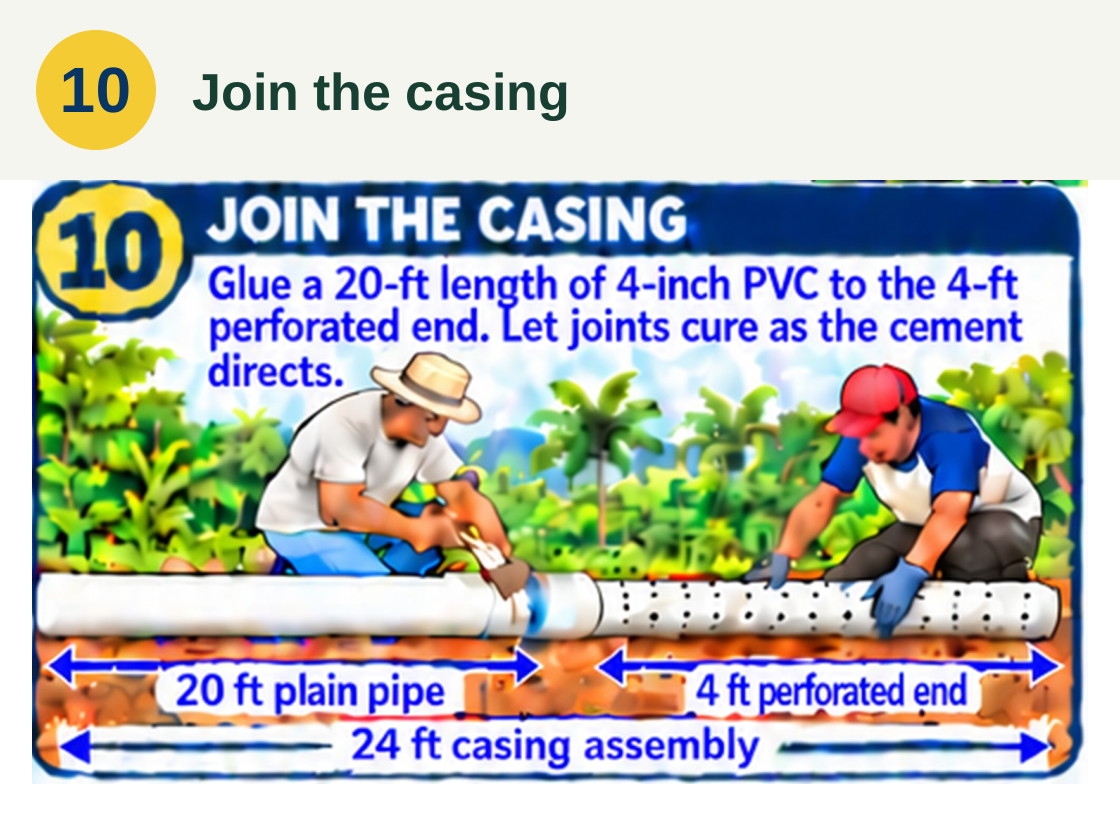
The team joins a 20-foot length of 4-inch PVC to the capped, 4-foot perforated section from the kit. Together, they form the first 24 feet of casing. Clean joints and the cement’s curing time matter because the connections will carry the weight of the pipe as it is lowered.
Glue a 20-foot length of 4-inch PVC to the capped 4-foot perforated section. This makes an initial 24-foot casing assembly. Keep soil out of the joints and let the cement cure according to its instructions before lowering the assembly.
Step 11
Wrap the filter
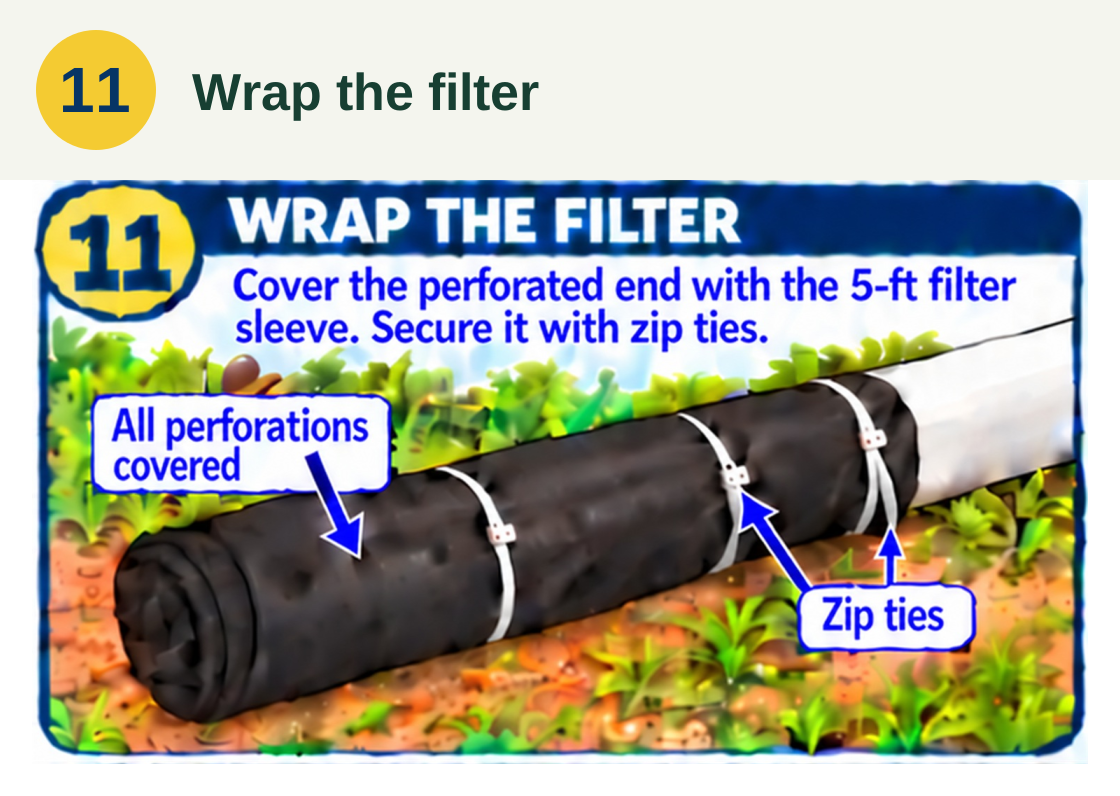
A 5-foot filter sleeve covers the entire perforated section and is held in place with zip ties. The bottom cap stays attached. Water can enter through the covered holes while the sleeve helps keep fine material out of the casing.
Pull the 5-foot filter sleeve over the entire perforated section. Cover every hole and fasten the sleeve with zip ties so it stays in place during lowering. Keep the bottom cap attached. The sleeve helps keep fine material from entering through the perforations.
Step 12
Lower and extend
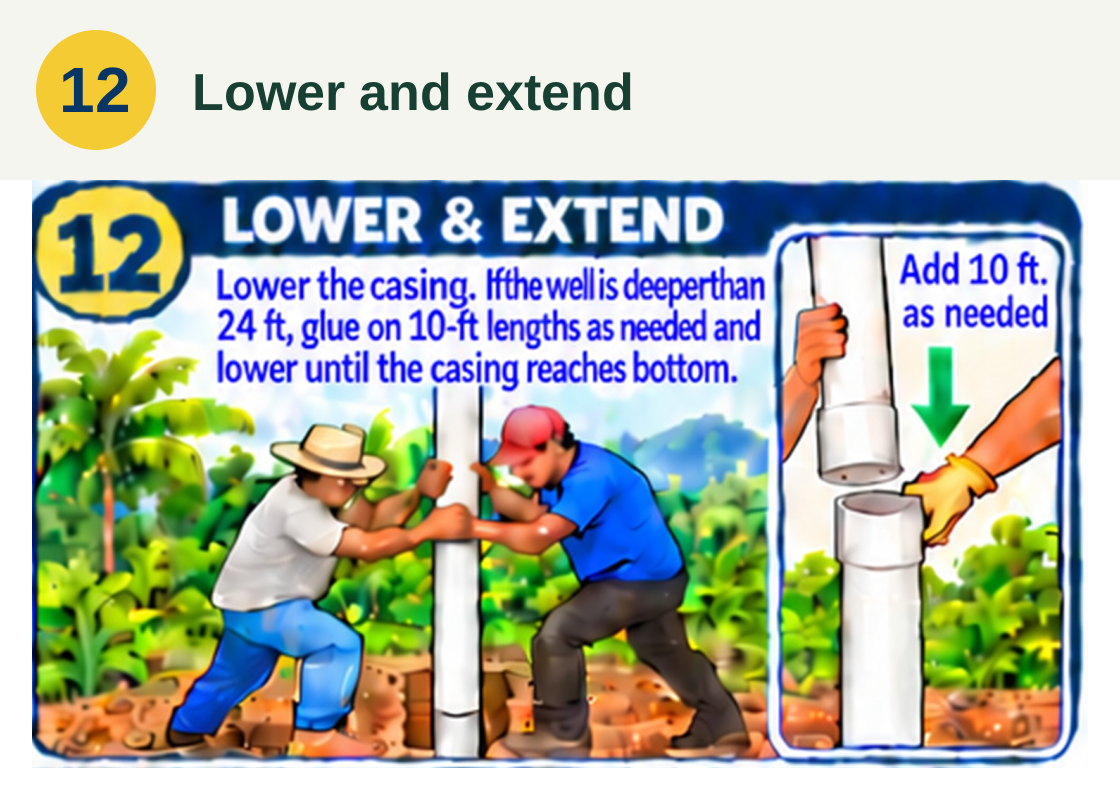
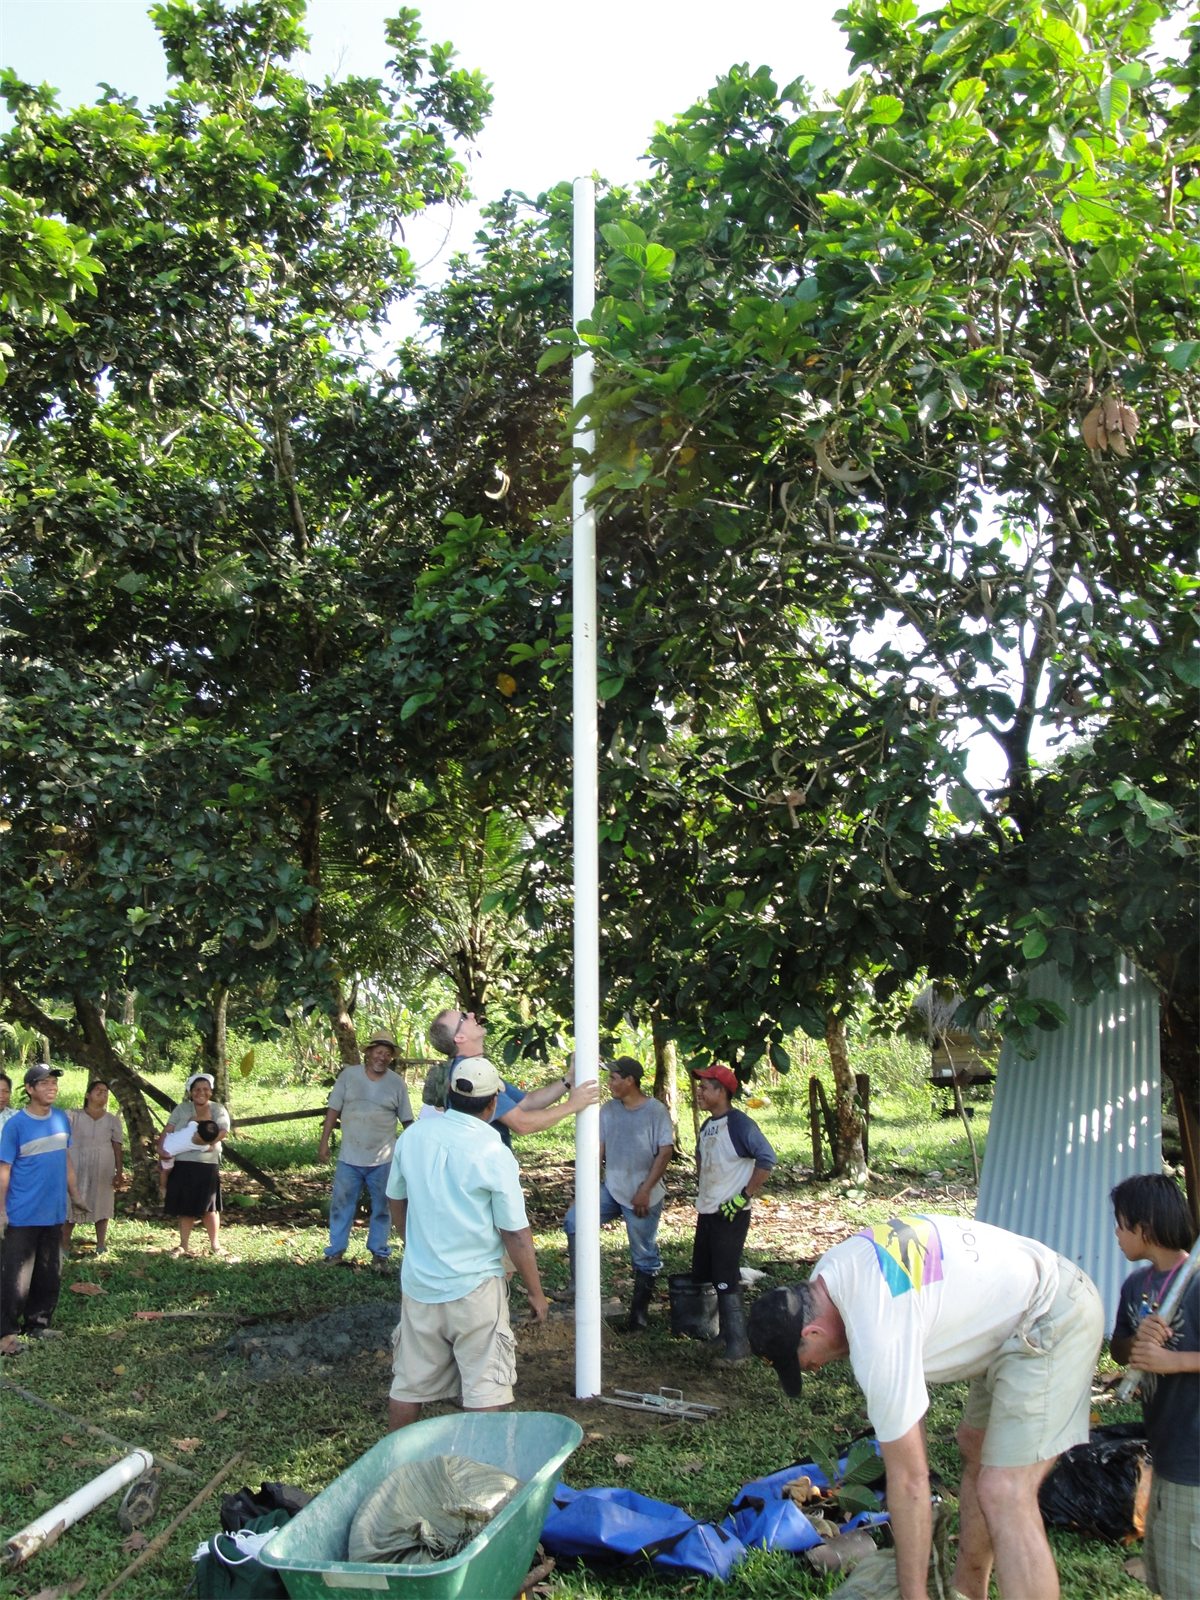
Lowering the long casing takes teamwork. The crew supports the pipe while making each connection and allows the cement to cure before putting weight on the joint. For a well deeper than the first 24 feet, they add 10-foot lengths as needed until the capped end reaches the bottom.
Lower the casing as a team and keep control of it while making each connection. If the well is deeper than 24 feet, add 10-foot lengths as needed. Let each glued joint cure before loading it. Continue until the capped bottom reaches the bottom of the well.
Step 13
Add the pea-gravel filter pack
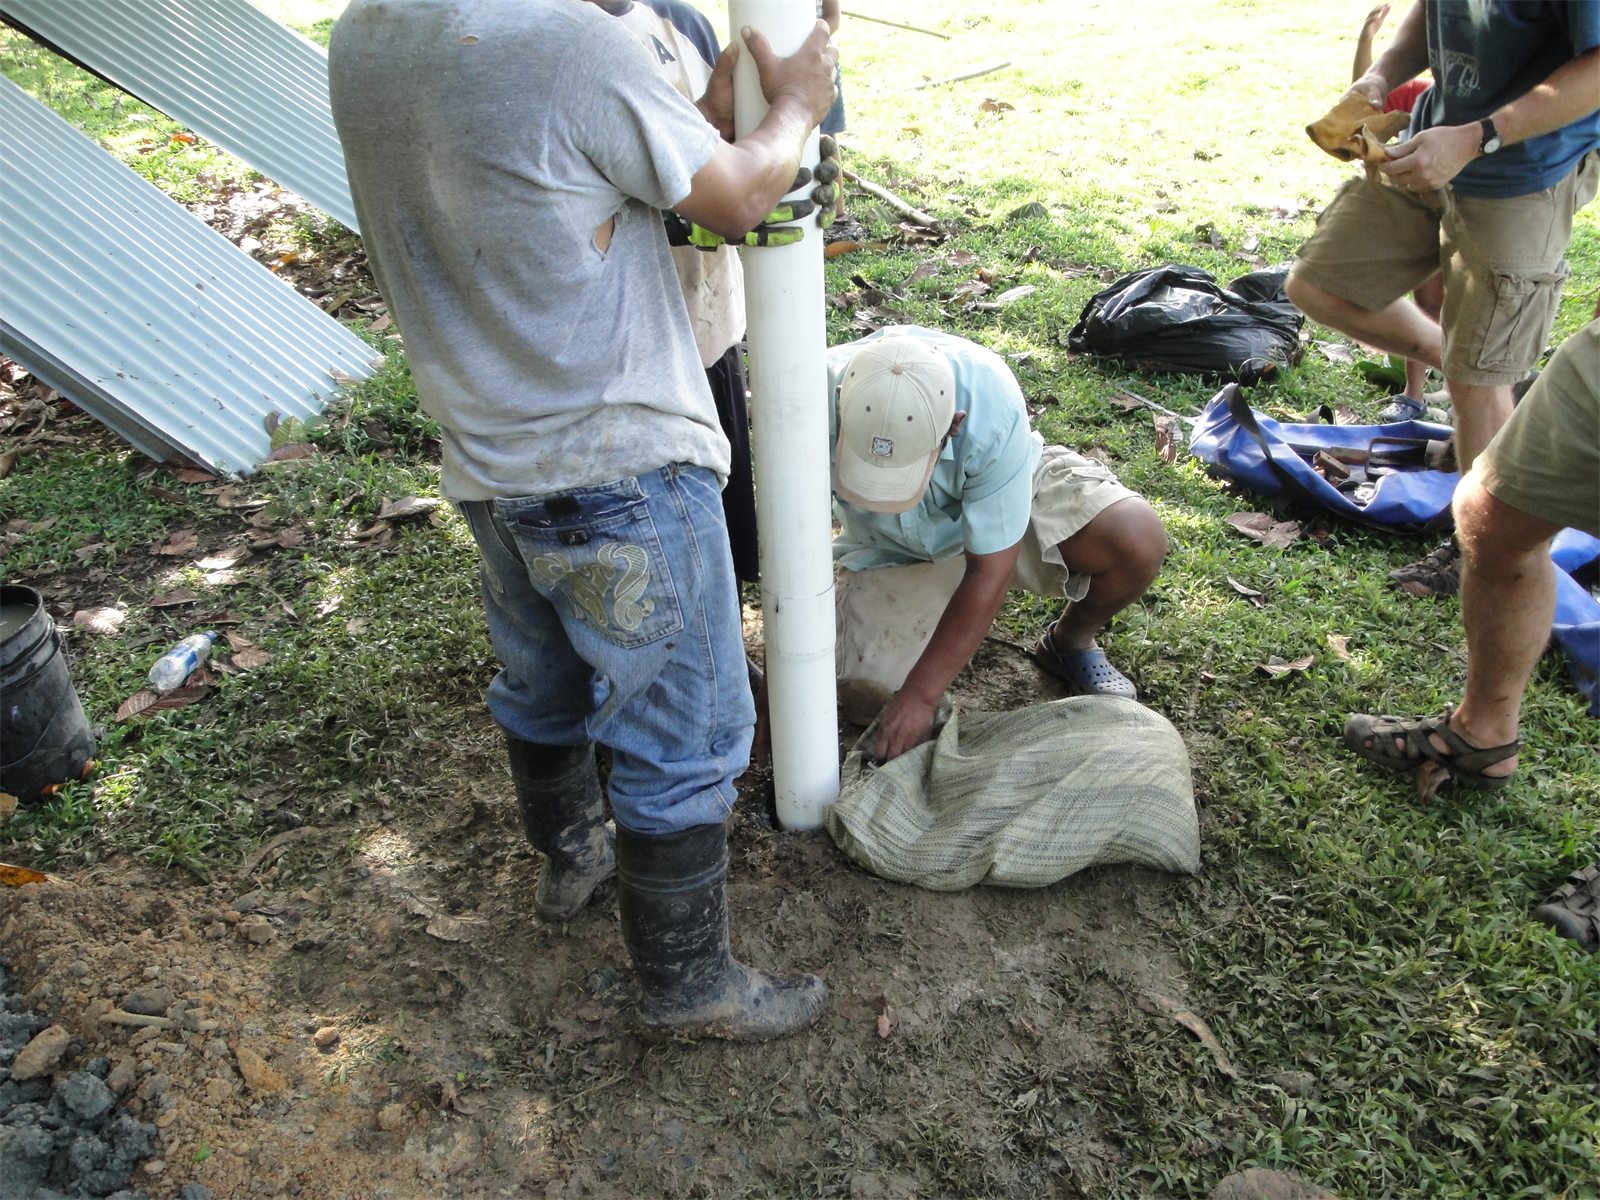
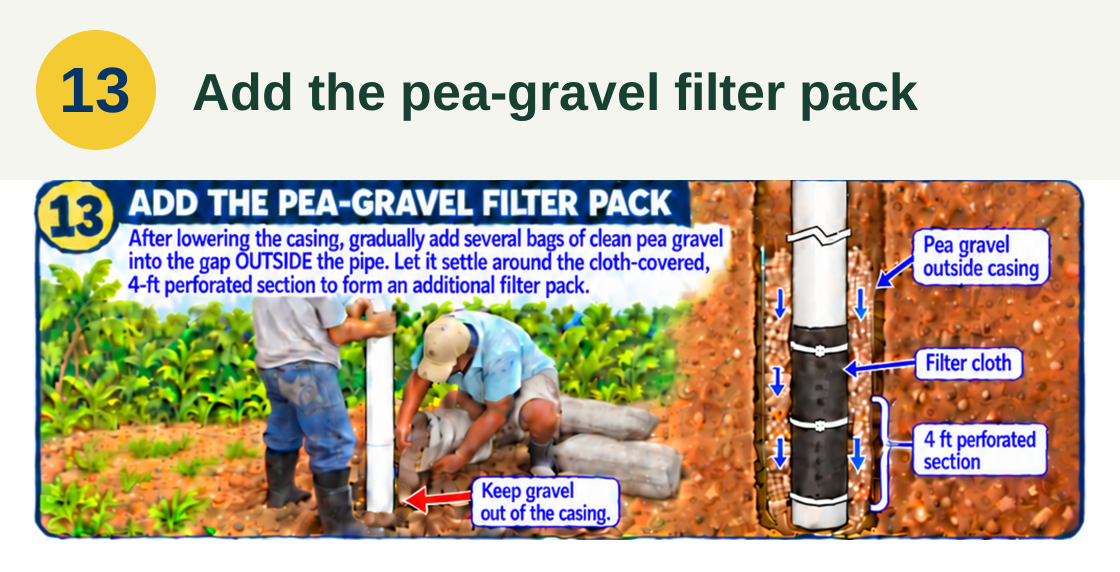
After the casing is in place, the crew gradually adds several bags of clean pea gravel to the gap outside it. The gravel settles around the cloth-covered, 4-foot perforated section and forms an additional filter pack at the intake. The casing opening stays protected so gravel does not fall inside, and the upper space remains available for the permanent seal.
After lowering the casing, gradually add several bags of clean pea gravel into the gap outside it. Allow the gravel to settle around the cloth-covered, 4-foot perforated section. This creates an additional filter pack around the intake. Keep gravel out of the casing and leave room above for the outside well seal.
Step 14
Trim and add the riser
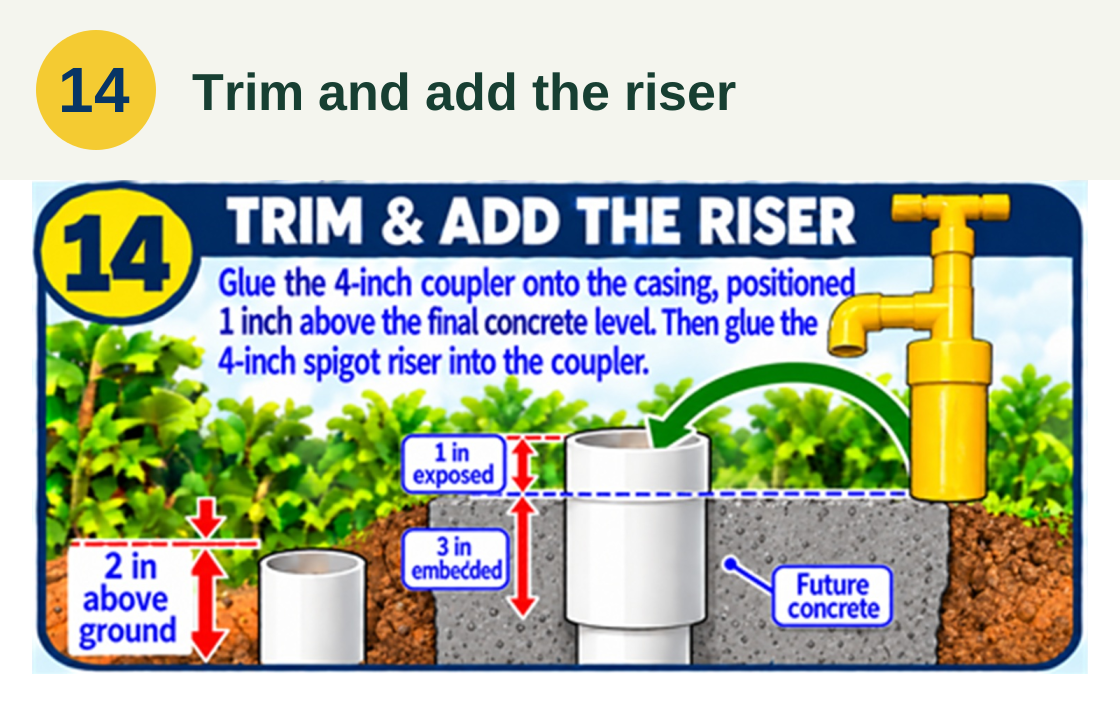
The casing is trimmed to 2 inches above bare ground, and the 4-inch coupler is positioned for the future slab: 3 inches of its body will sit in concrete and 1 inch will remain above it. The fixed riser is glued into this connection. Its cap and spigot lift off together, giving the family access for bailing without removing the riser.
Cut the casing 2 inches above bare ground. Glue on the 4-inch coupler at a height that will leave its top 1 inch above the finished concrete, with 3 inches embedded. Glue the 4-inch riser into the coupler. Keep the connected cap-and-spigot assembly removable so the family can open the riser for bailing.
Step 15
Temporarily protect the base
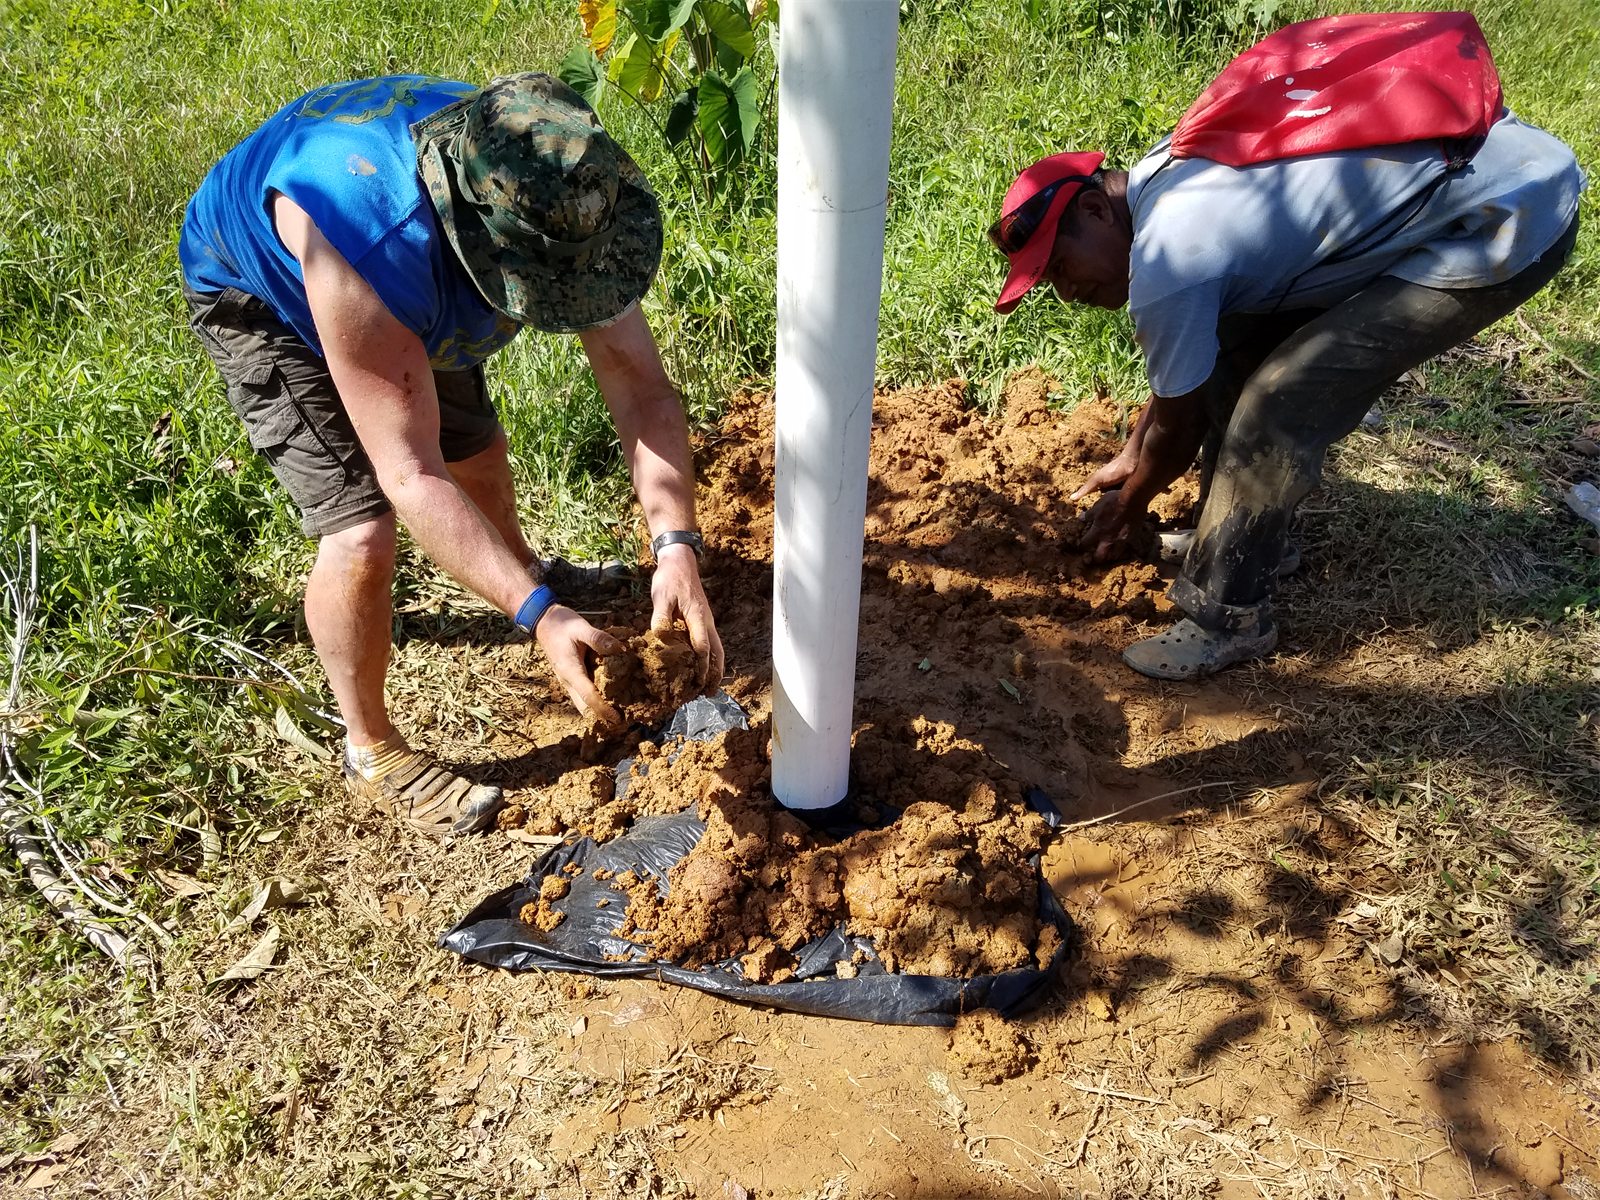
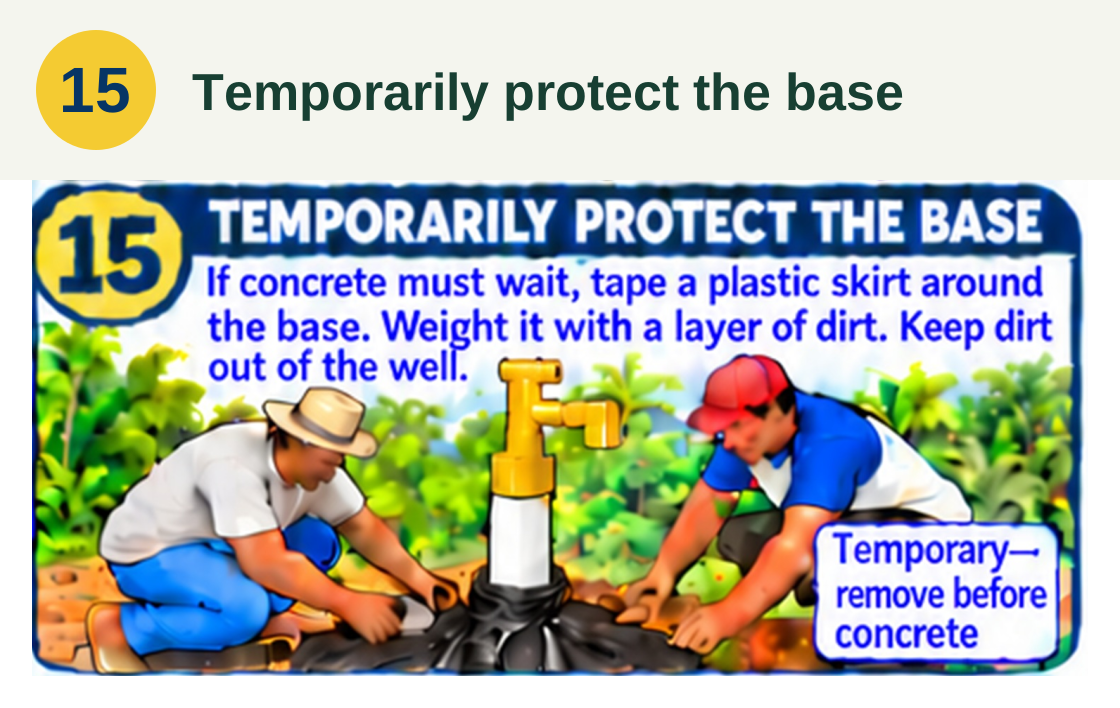
Sometimes the concrete work happens on a later visit. In the meantime, a plastic skirt taped around the base and weighted with soil helps keep dirt from entering around the casing. This is temporary protection; the skirt and loose soil come away when the crew is ready to make the permanent seal and slab.
If the concrete base must wait, tape a plastic skirt around the base and hold it down with a layer of soil. Keep soil out of the well opening. This cover is temporary: remove both the skirt and loose soil before placing the permanent outside seal and slab.
Step 16
The family clears sediment
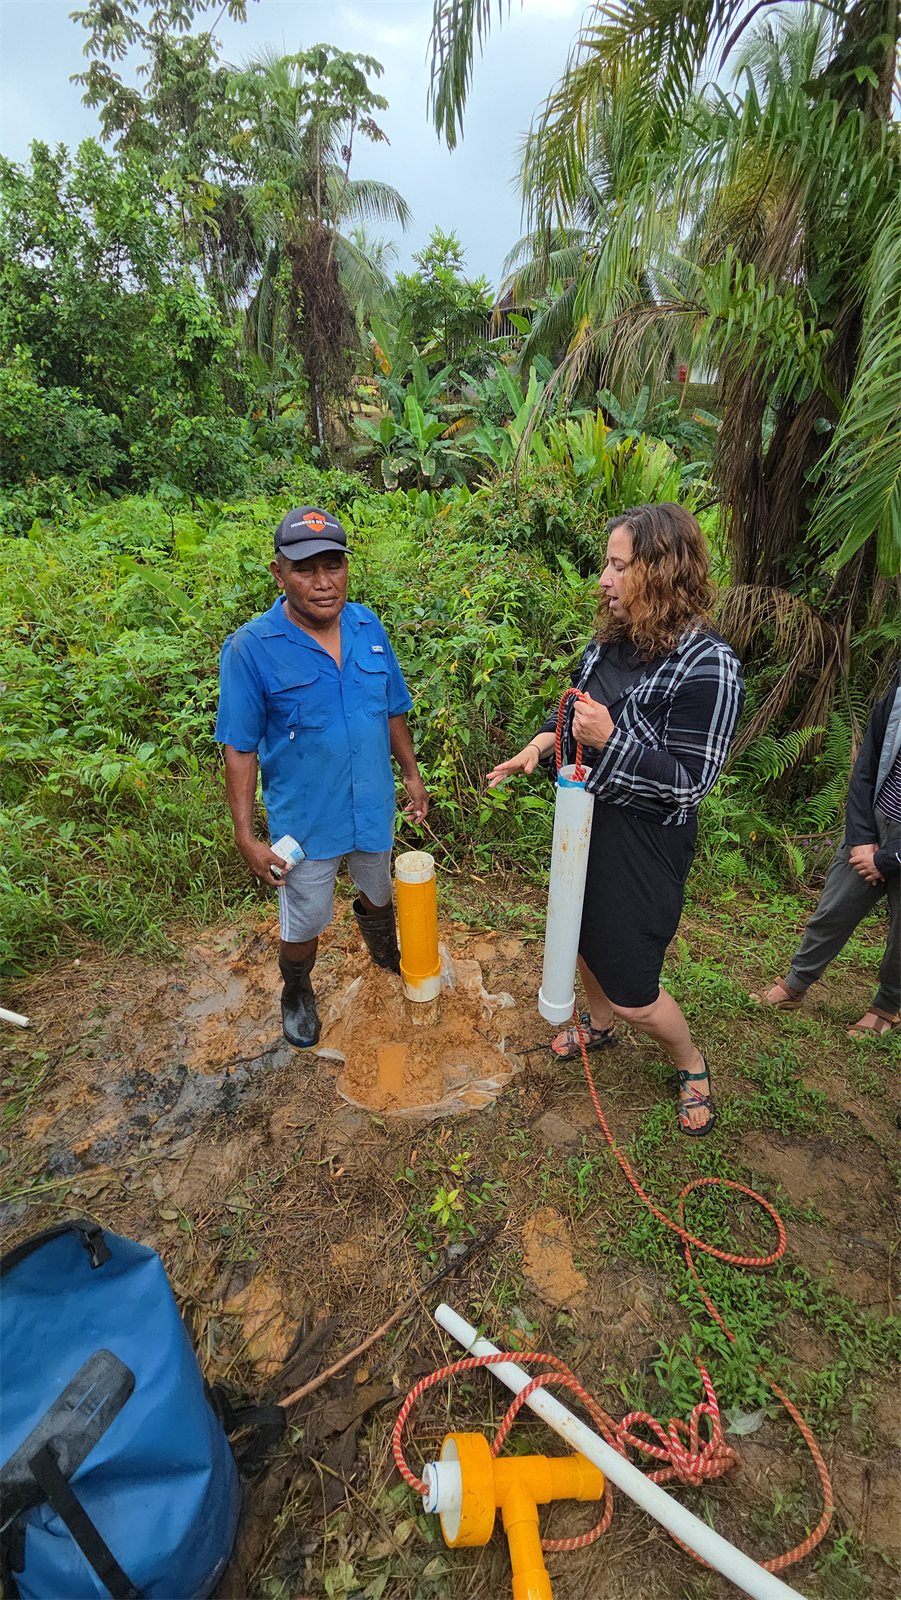
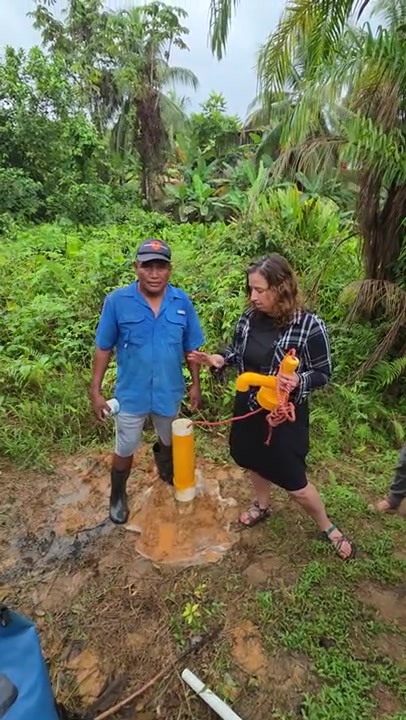
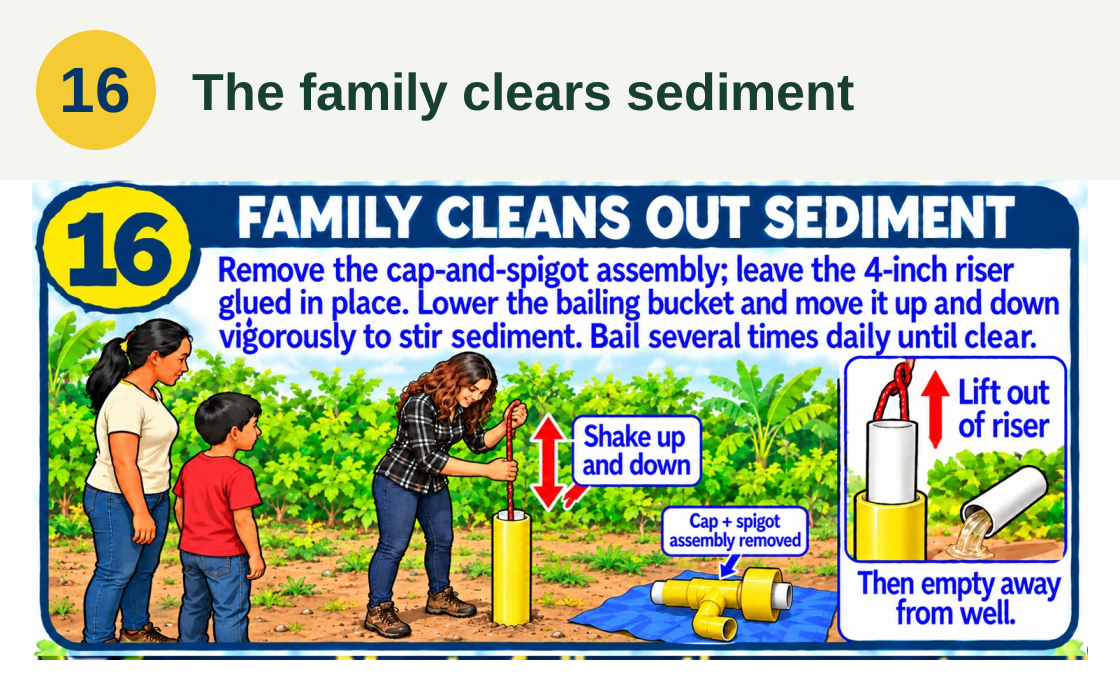
The family removes the cap-and-spigot assembly and lowers the white bailing bucket through the open riser. Shaking it up and down stirs the sediment and fills the bucket. They lift it out, empty it away from the well, and repeat the routine several times a day until the water clears. Between cleanouts, the cap goes back on while the fixed riser stays in place.
Remove the connected cap-and-spigot assembly, leaving the fixed 4-inch riser glued in place. Lower the white bailing bucket on its rope through the open riser. Shake it vigorously up and down to stir sediment and fill it, then lift it out and empty it away from the well. Repeat several times a day until the discharge clears. Replace the cap between cleanout sessions.
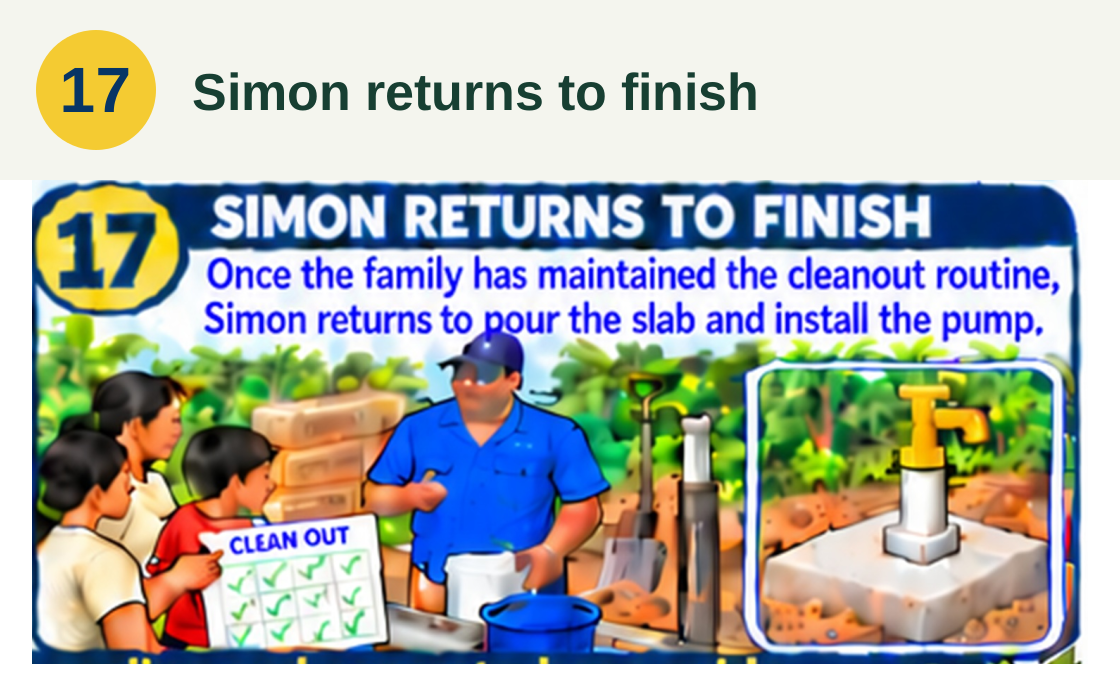
Step 17
Simon returns to finish
Once the family has kept up the cleanout routine and the water is free of visible mud and sand, Simón returns to finish the seal, pour the base, and install the pump. Clear water marks progress in cleaning, but it can still contain germs. Boiling disinfects the water before drinking.
Keep cleaning the well until the water is free of visible mud and sand. Simón then returns to seal around the casing, pour the concrete base, and install the pump. Boil water intended for drinking, even if it looks clear. Let it cool and keep it in a clean, covered container.
Preview the complete print sheet
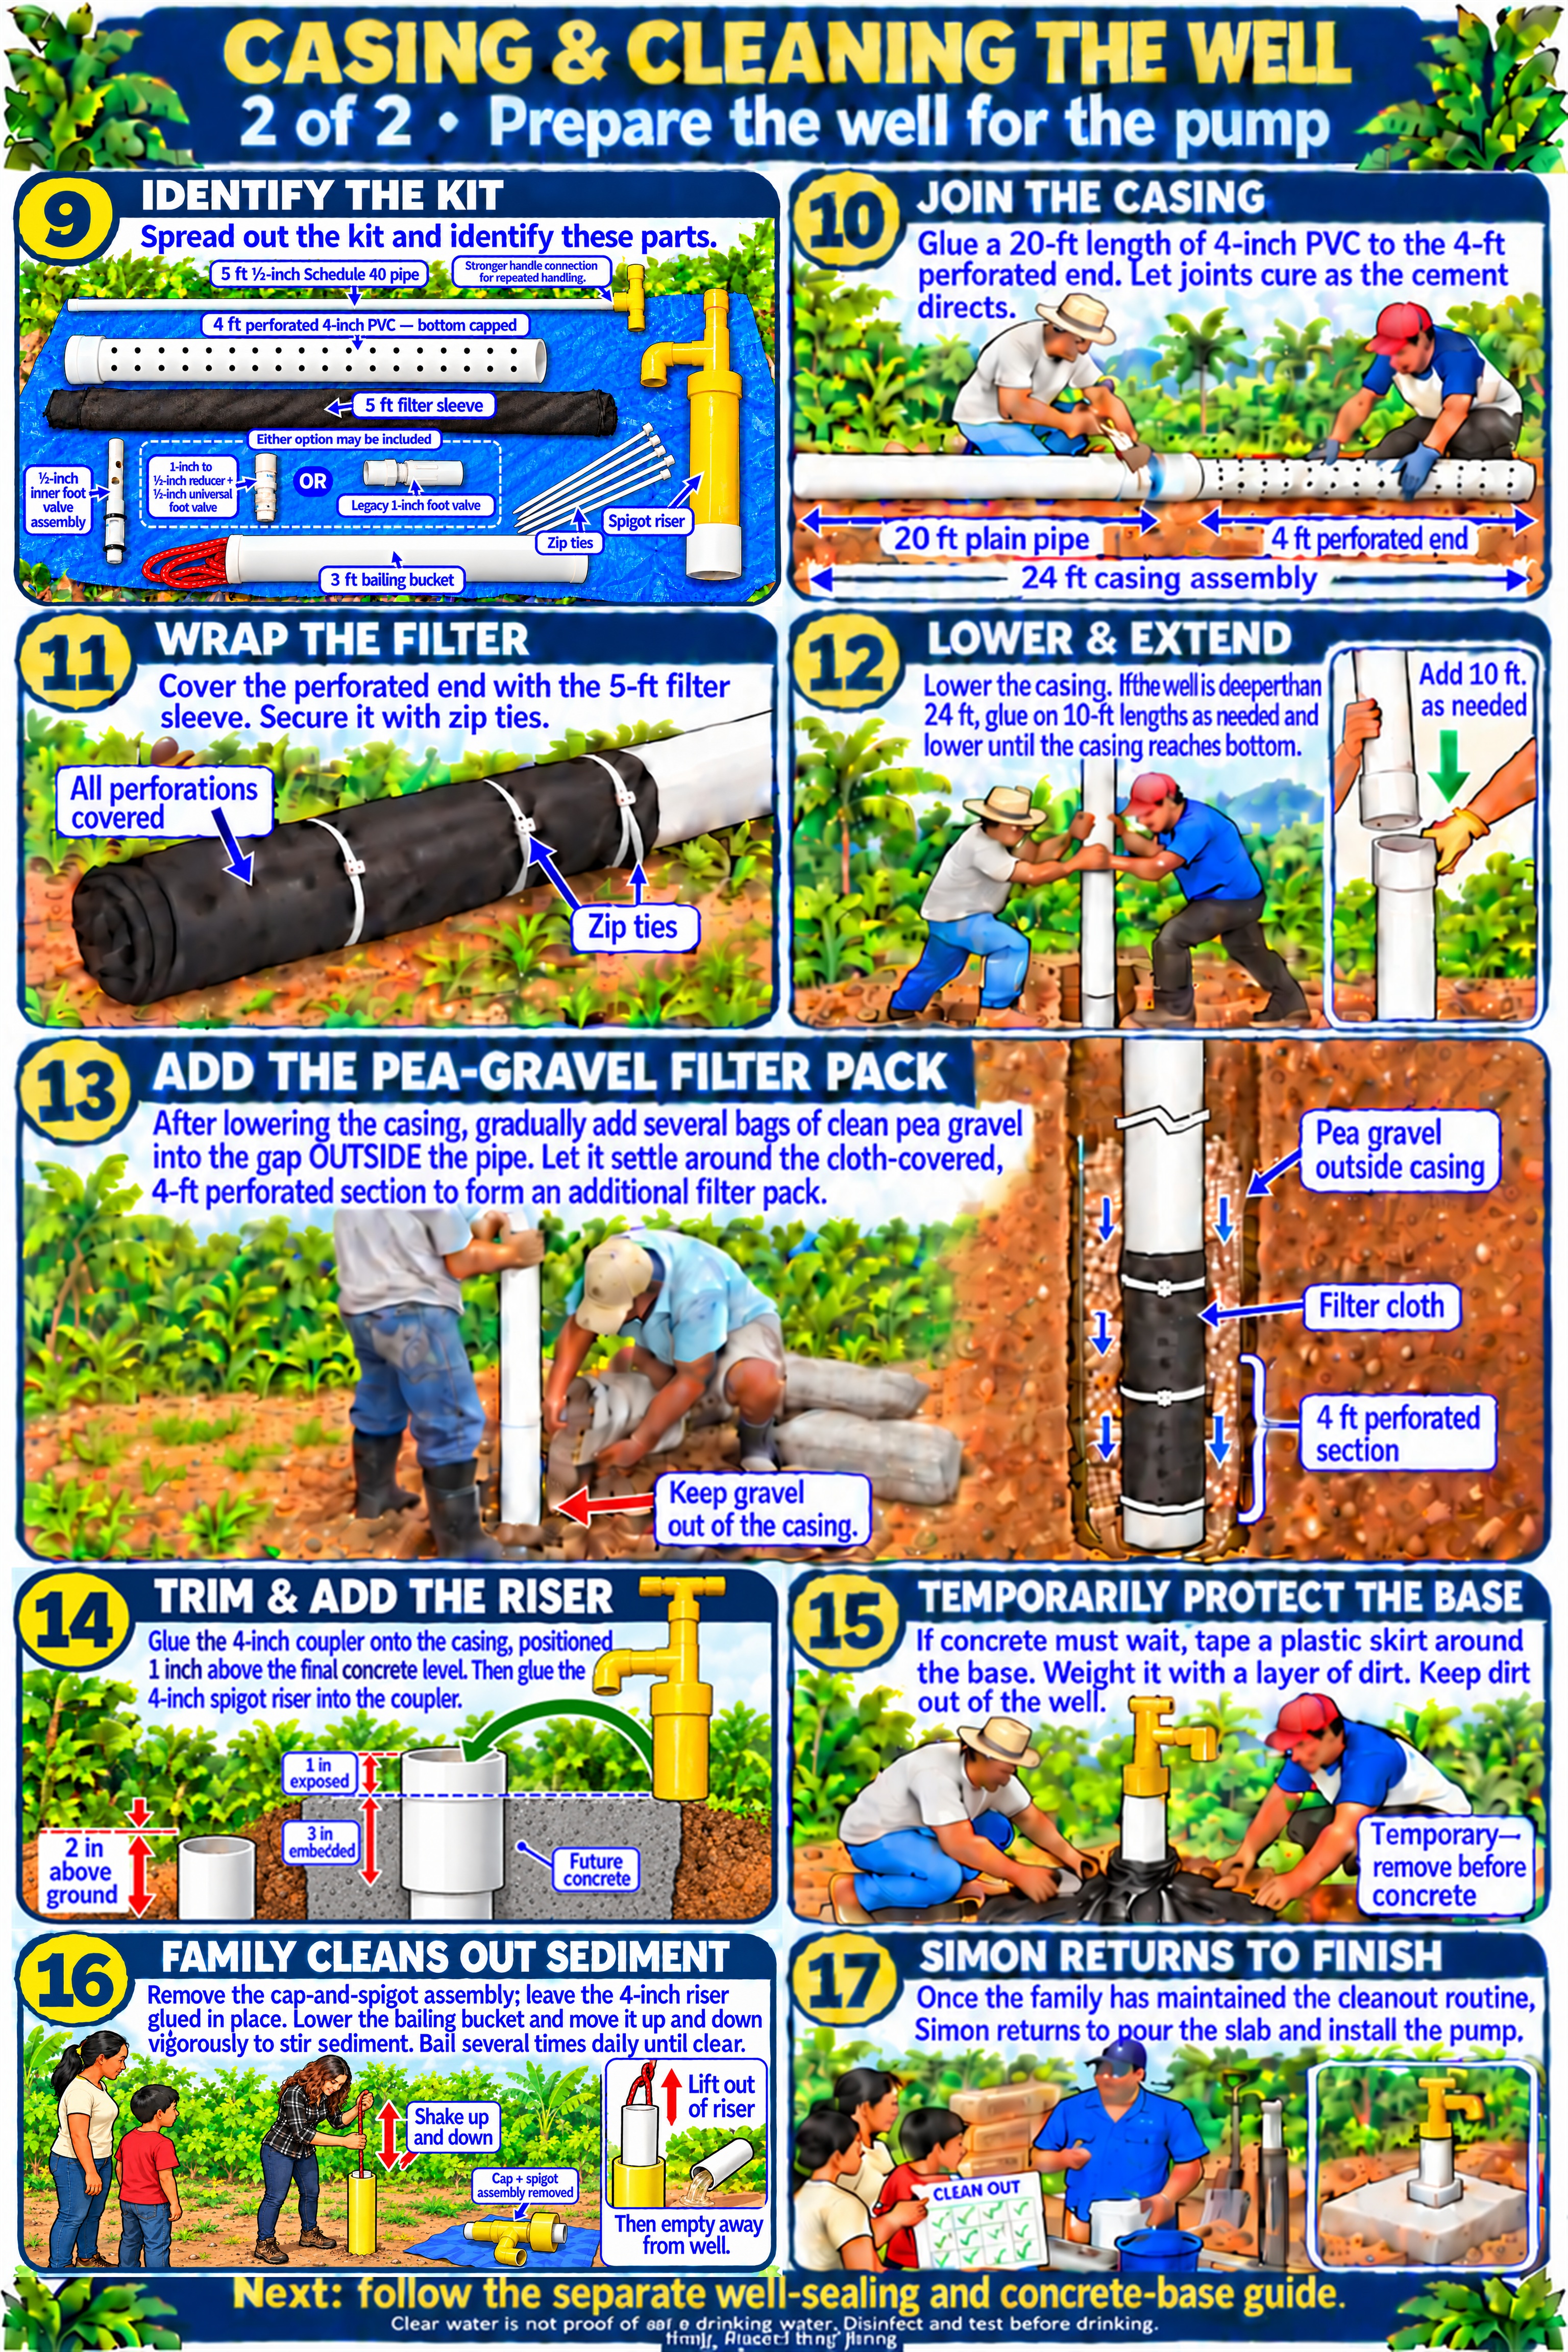 See the illustrated steps
Construction details
Identify the prepared parts
The prepared kit includes a capped, 4-foot perforated casing section, a 5-foot filter sleeve, zip ties, a 3-foot bailing bucket and rope, and the spigot riser. The smaller parts include the inner valve, an outer-valve option, and a 5-foot Schedule 40 pipe for the handle. Long lengths of casing and pump pipe are added at the well site to match its depth.
- 4-foot perforated section of nominal 4-inch PVC, with the bottom capped.
- 5-foot filter sleeve and long zip ties.
- 3-foot bailing bucket with rope and two universal 1/2-inch valves.
- 5-foot length of 1/2-inch Schedule 40 pipe with its T handle.
Join and wrap the casing
The first casing assembly joins a 20-foot length of 4-inch PVC to the capped, 4-foot perforated section. A 5-foot filter sleeve covers all the holes and is held in place with zip ties. The cap closes the bottom, and the glued joints have time to cure before the team lowers the pipe.
Lower and extend under guidance
Several people support the casing as it goes into the well. For depths beyond the initial 24-foot assembly, the crew adds 10-foot lengths as needed and lowers the pipe until the capped end reaches the bottom. Each connection is supported while the cement cures.
Place the outside filter pack
Clean pea gravel is added gradually outside the casing. It settles around the cloth-covered perforations at the bottom, forming another filter around the intake. The opening stays protected so gravel does not fall inside. The permanent outside seal and concrete base follow the cleanout stage.
Bail and empty away from the well
The cap and spigot come off as one assembly, leaving the fixed 4-inch riser in place. Through that opening, the family lowers a white bailing bucket on a rope and shakes it up and down to stir the sediment. They lift it out and empty it away from the well. This routine, repeated several times a day, is the family’s part in getting the well ready for the pump.
Before drinking from the well
Bailing removes visible mud and sand. Even after the water runs clear, it can still contain germs. Boiling the water before drinking provides the disinfection needed in these rural homes, followed by cooling and storage in a clean, covered container.